Collecting, Cooking

It’s Party Time!

We took a couple of weeks off, so it’s great to be back! I recently co-hosted a baby shower/party with my daughter. Not having hosted a party for more than a year, we decided to have lots of food, drink, and fun!

I have a few really nice service pieces, but it’s mostly everyday dishes and glassware for me. So, I headed up to the Big Red Barn to see what I could find. A couple of ideas I had to share!

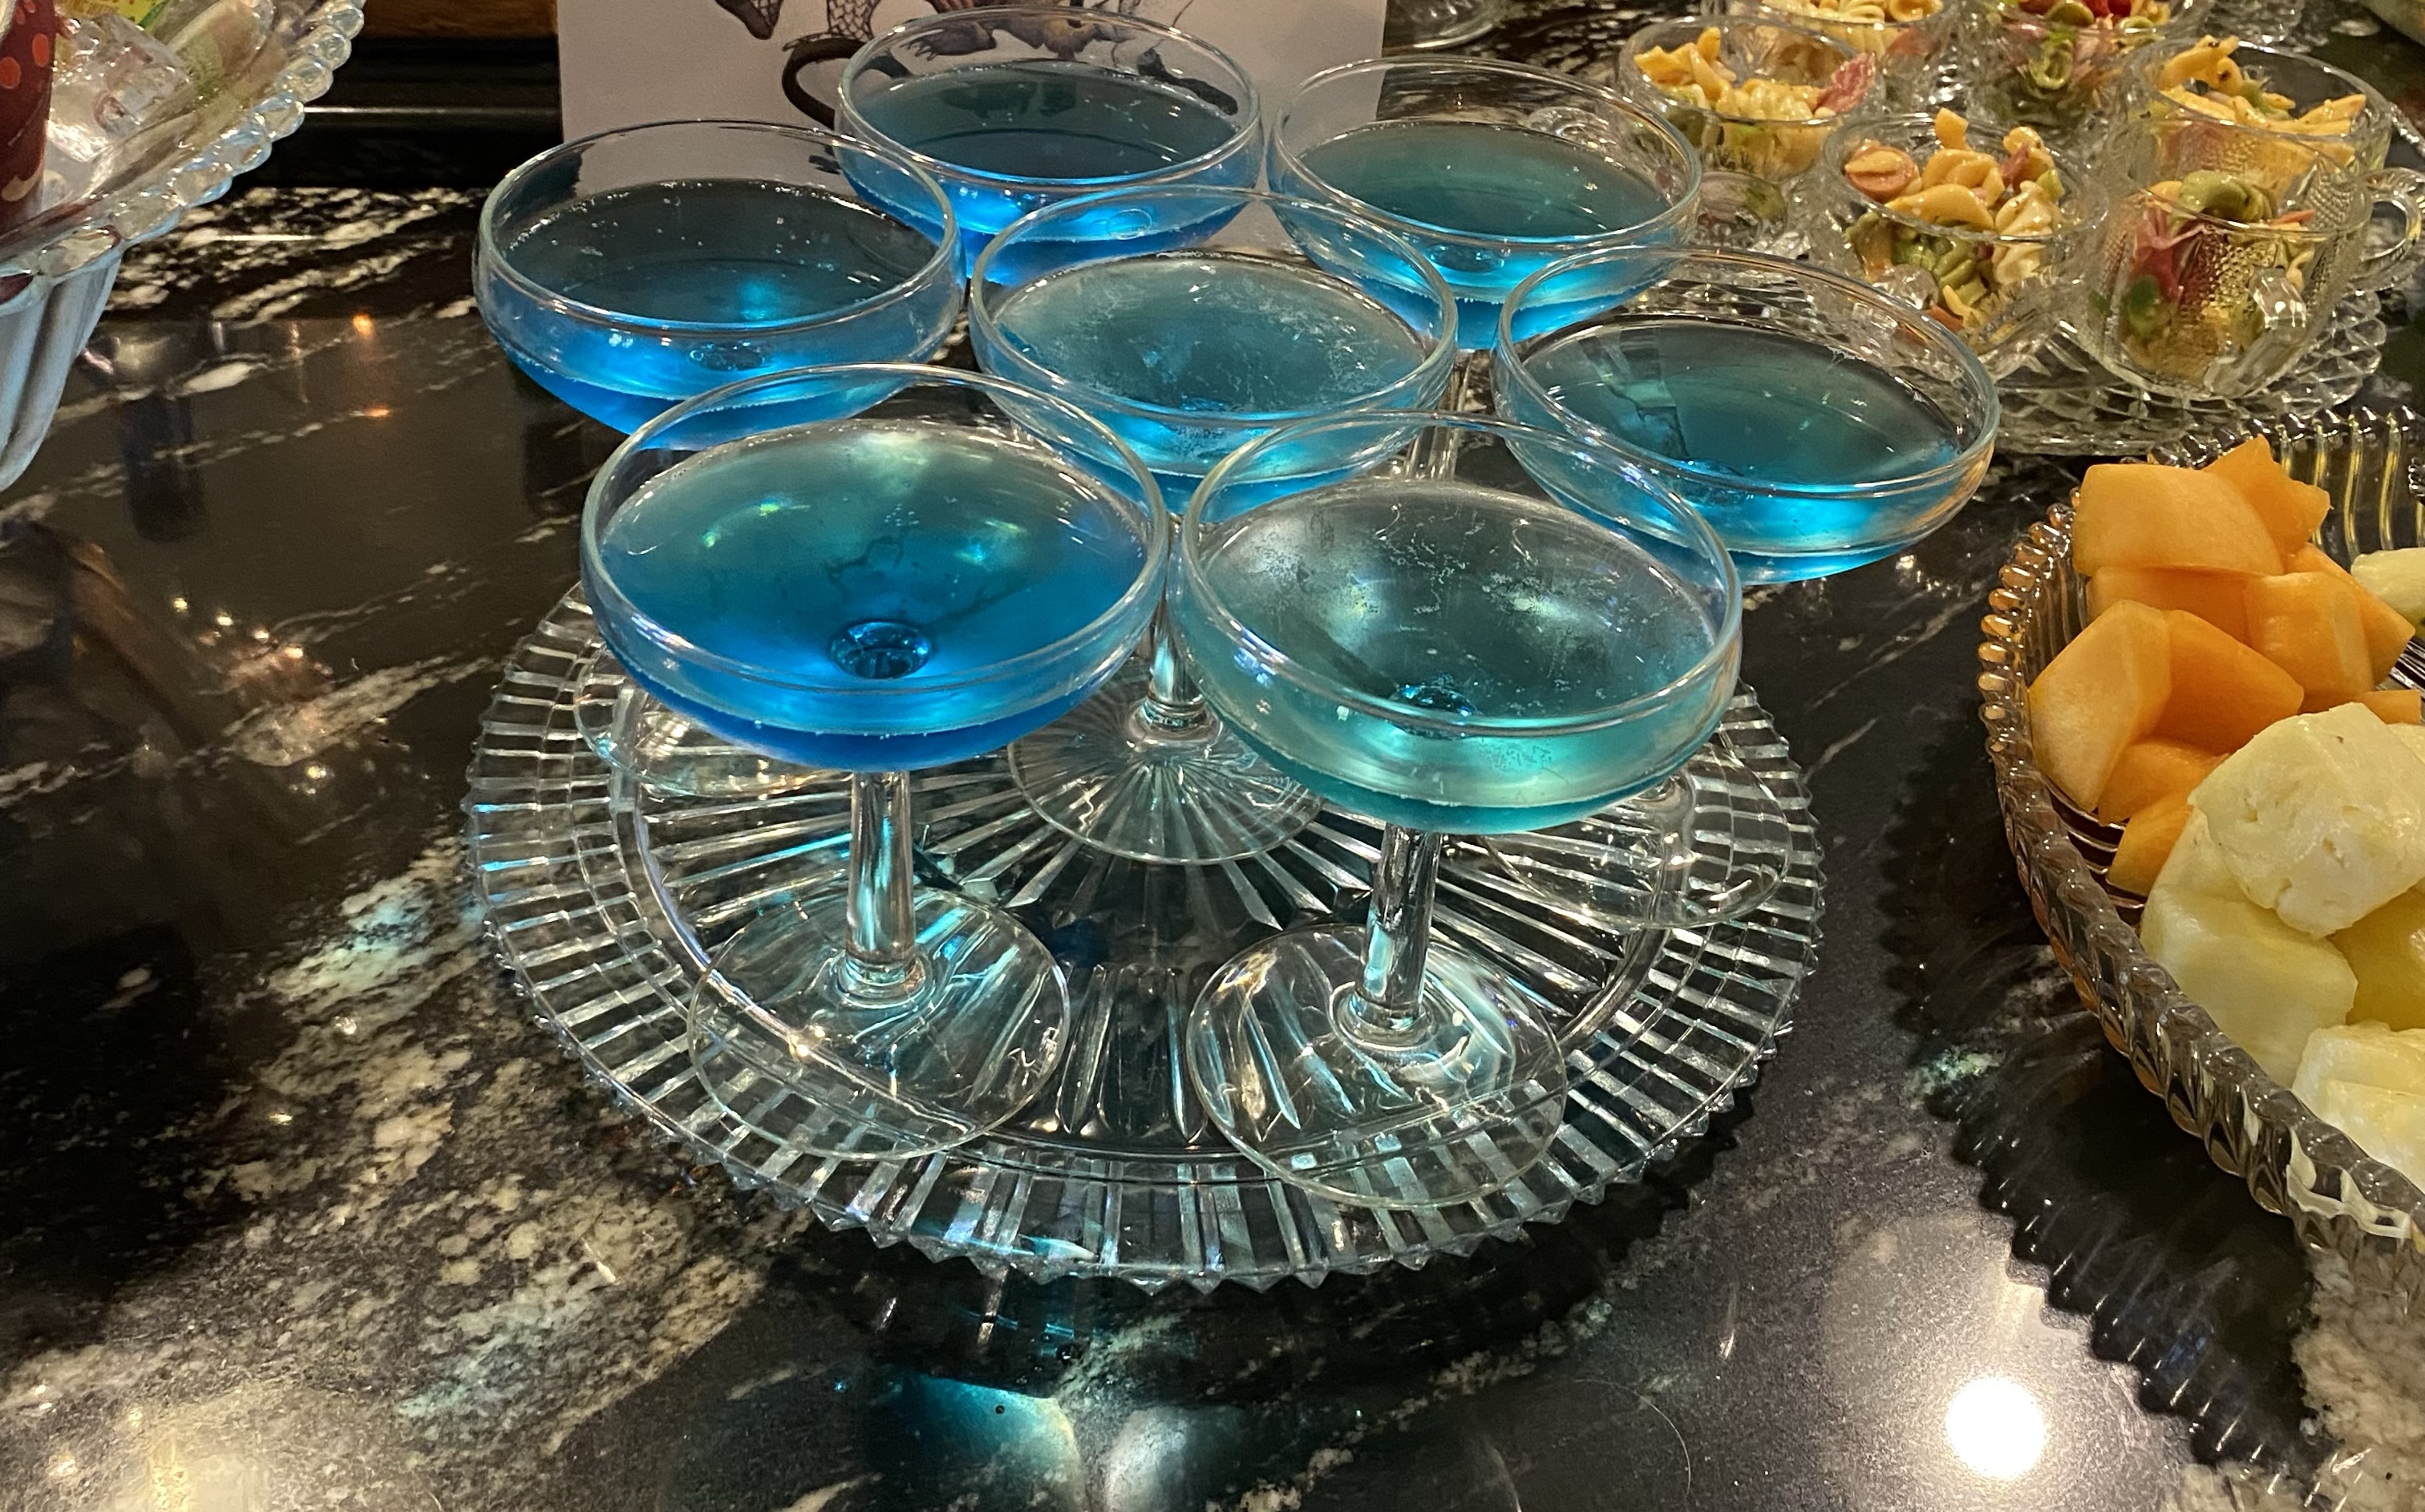
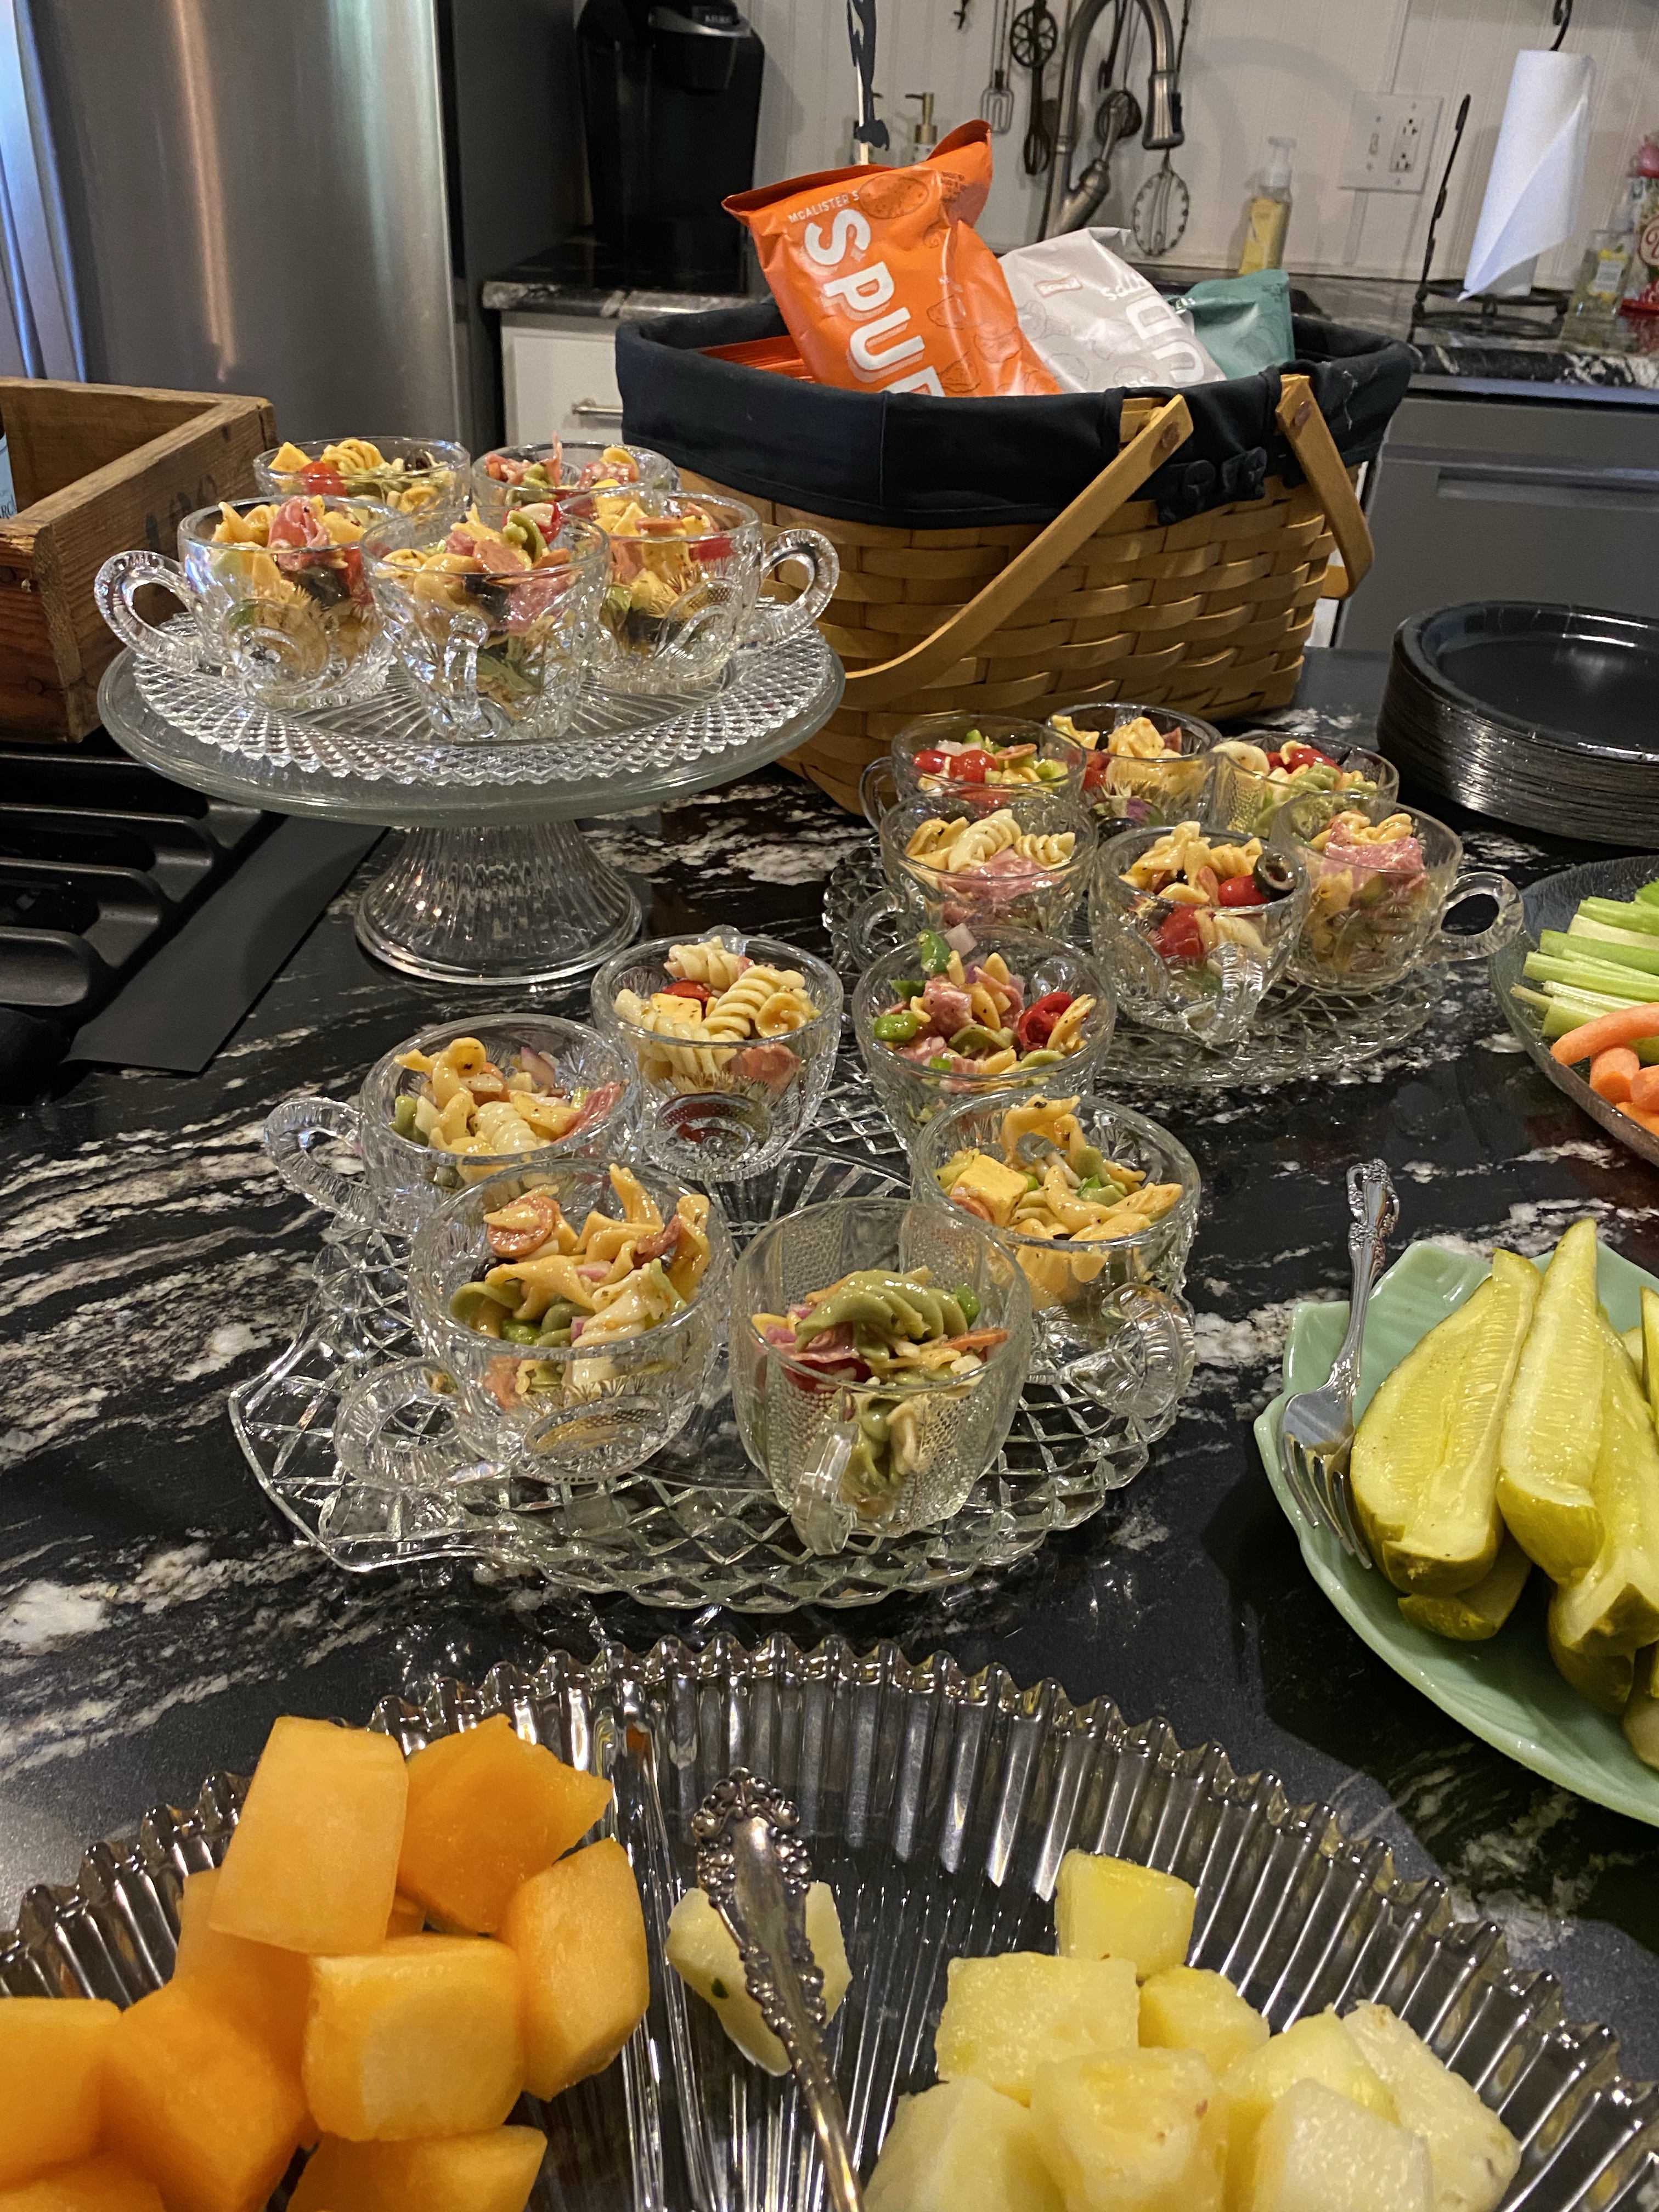
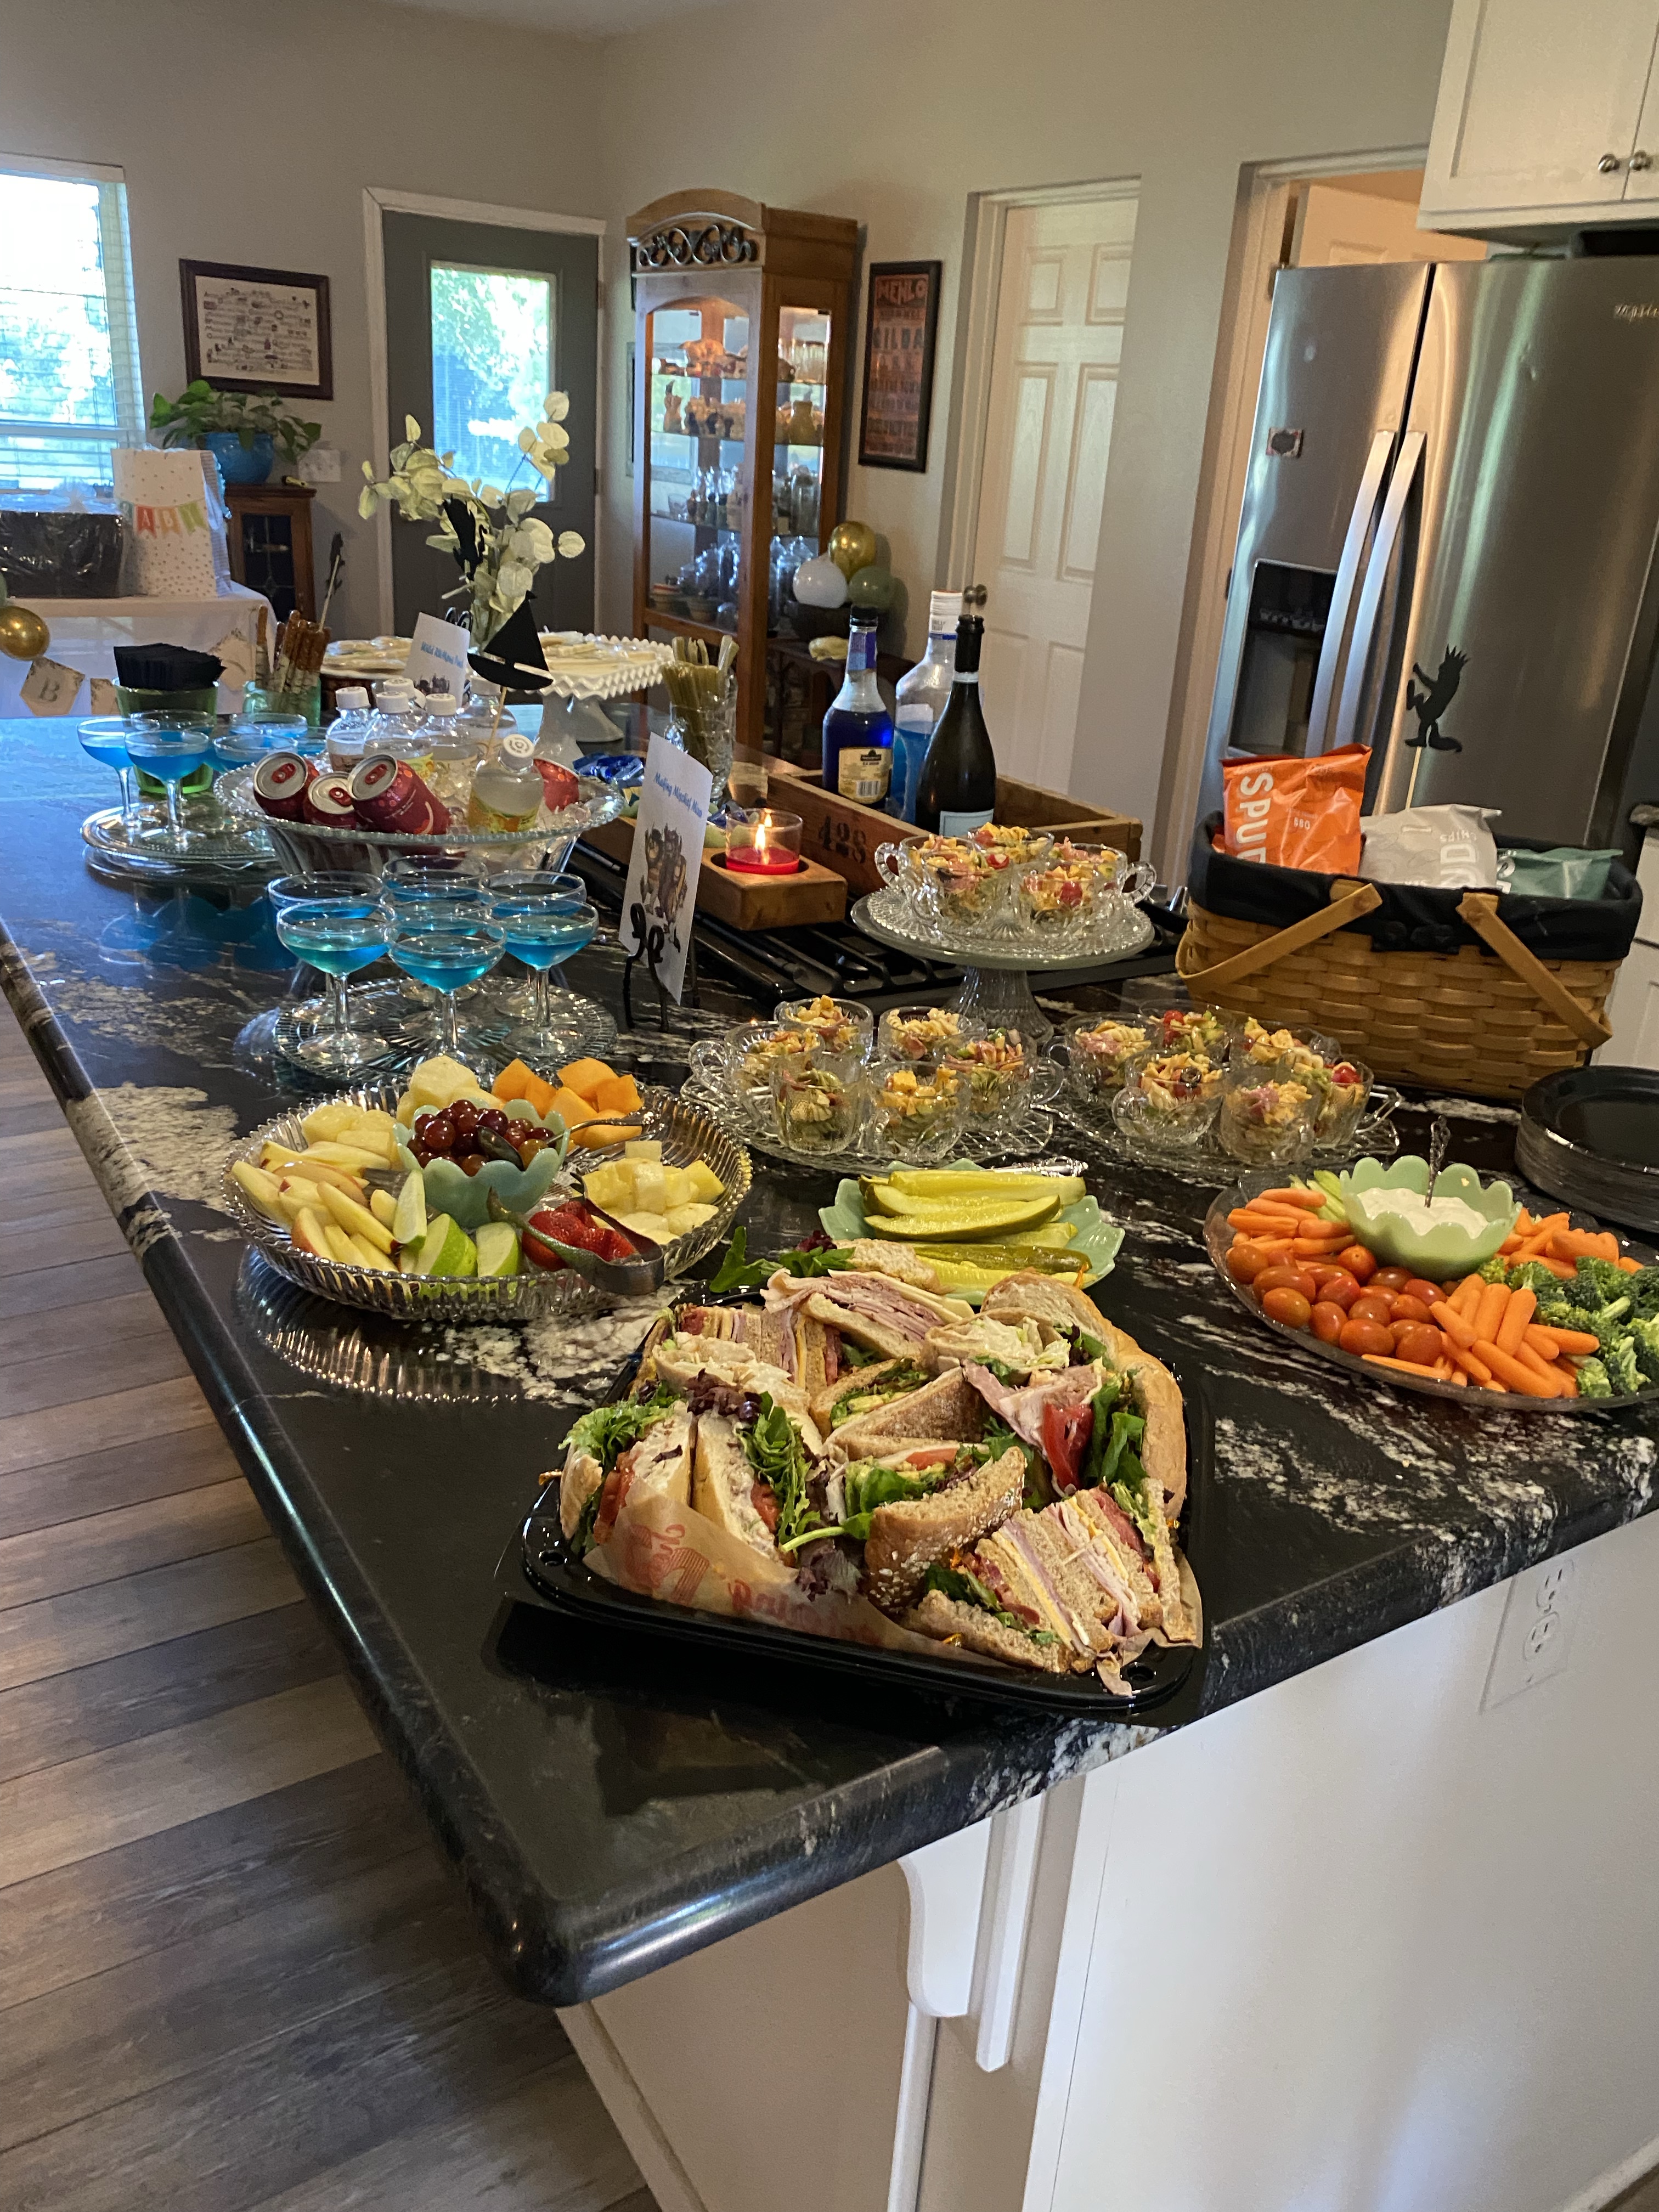
We served blue curaçao in Prosecco for the right color of drink (blue). A light meal of sandwiches from a local deli and homemade pasta salad. The pasta salad was served in punch cups! You could just grab and go. There are punch cups for sale EVERYWHERE! They’re generally very inexpensive and can be used to serve MANY different party offerings. Potato or pasta salads, veggies and dip, or desserts. The drinks were served in inexpensive champagne glasses. Again, these are available everywhere!

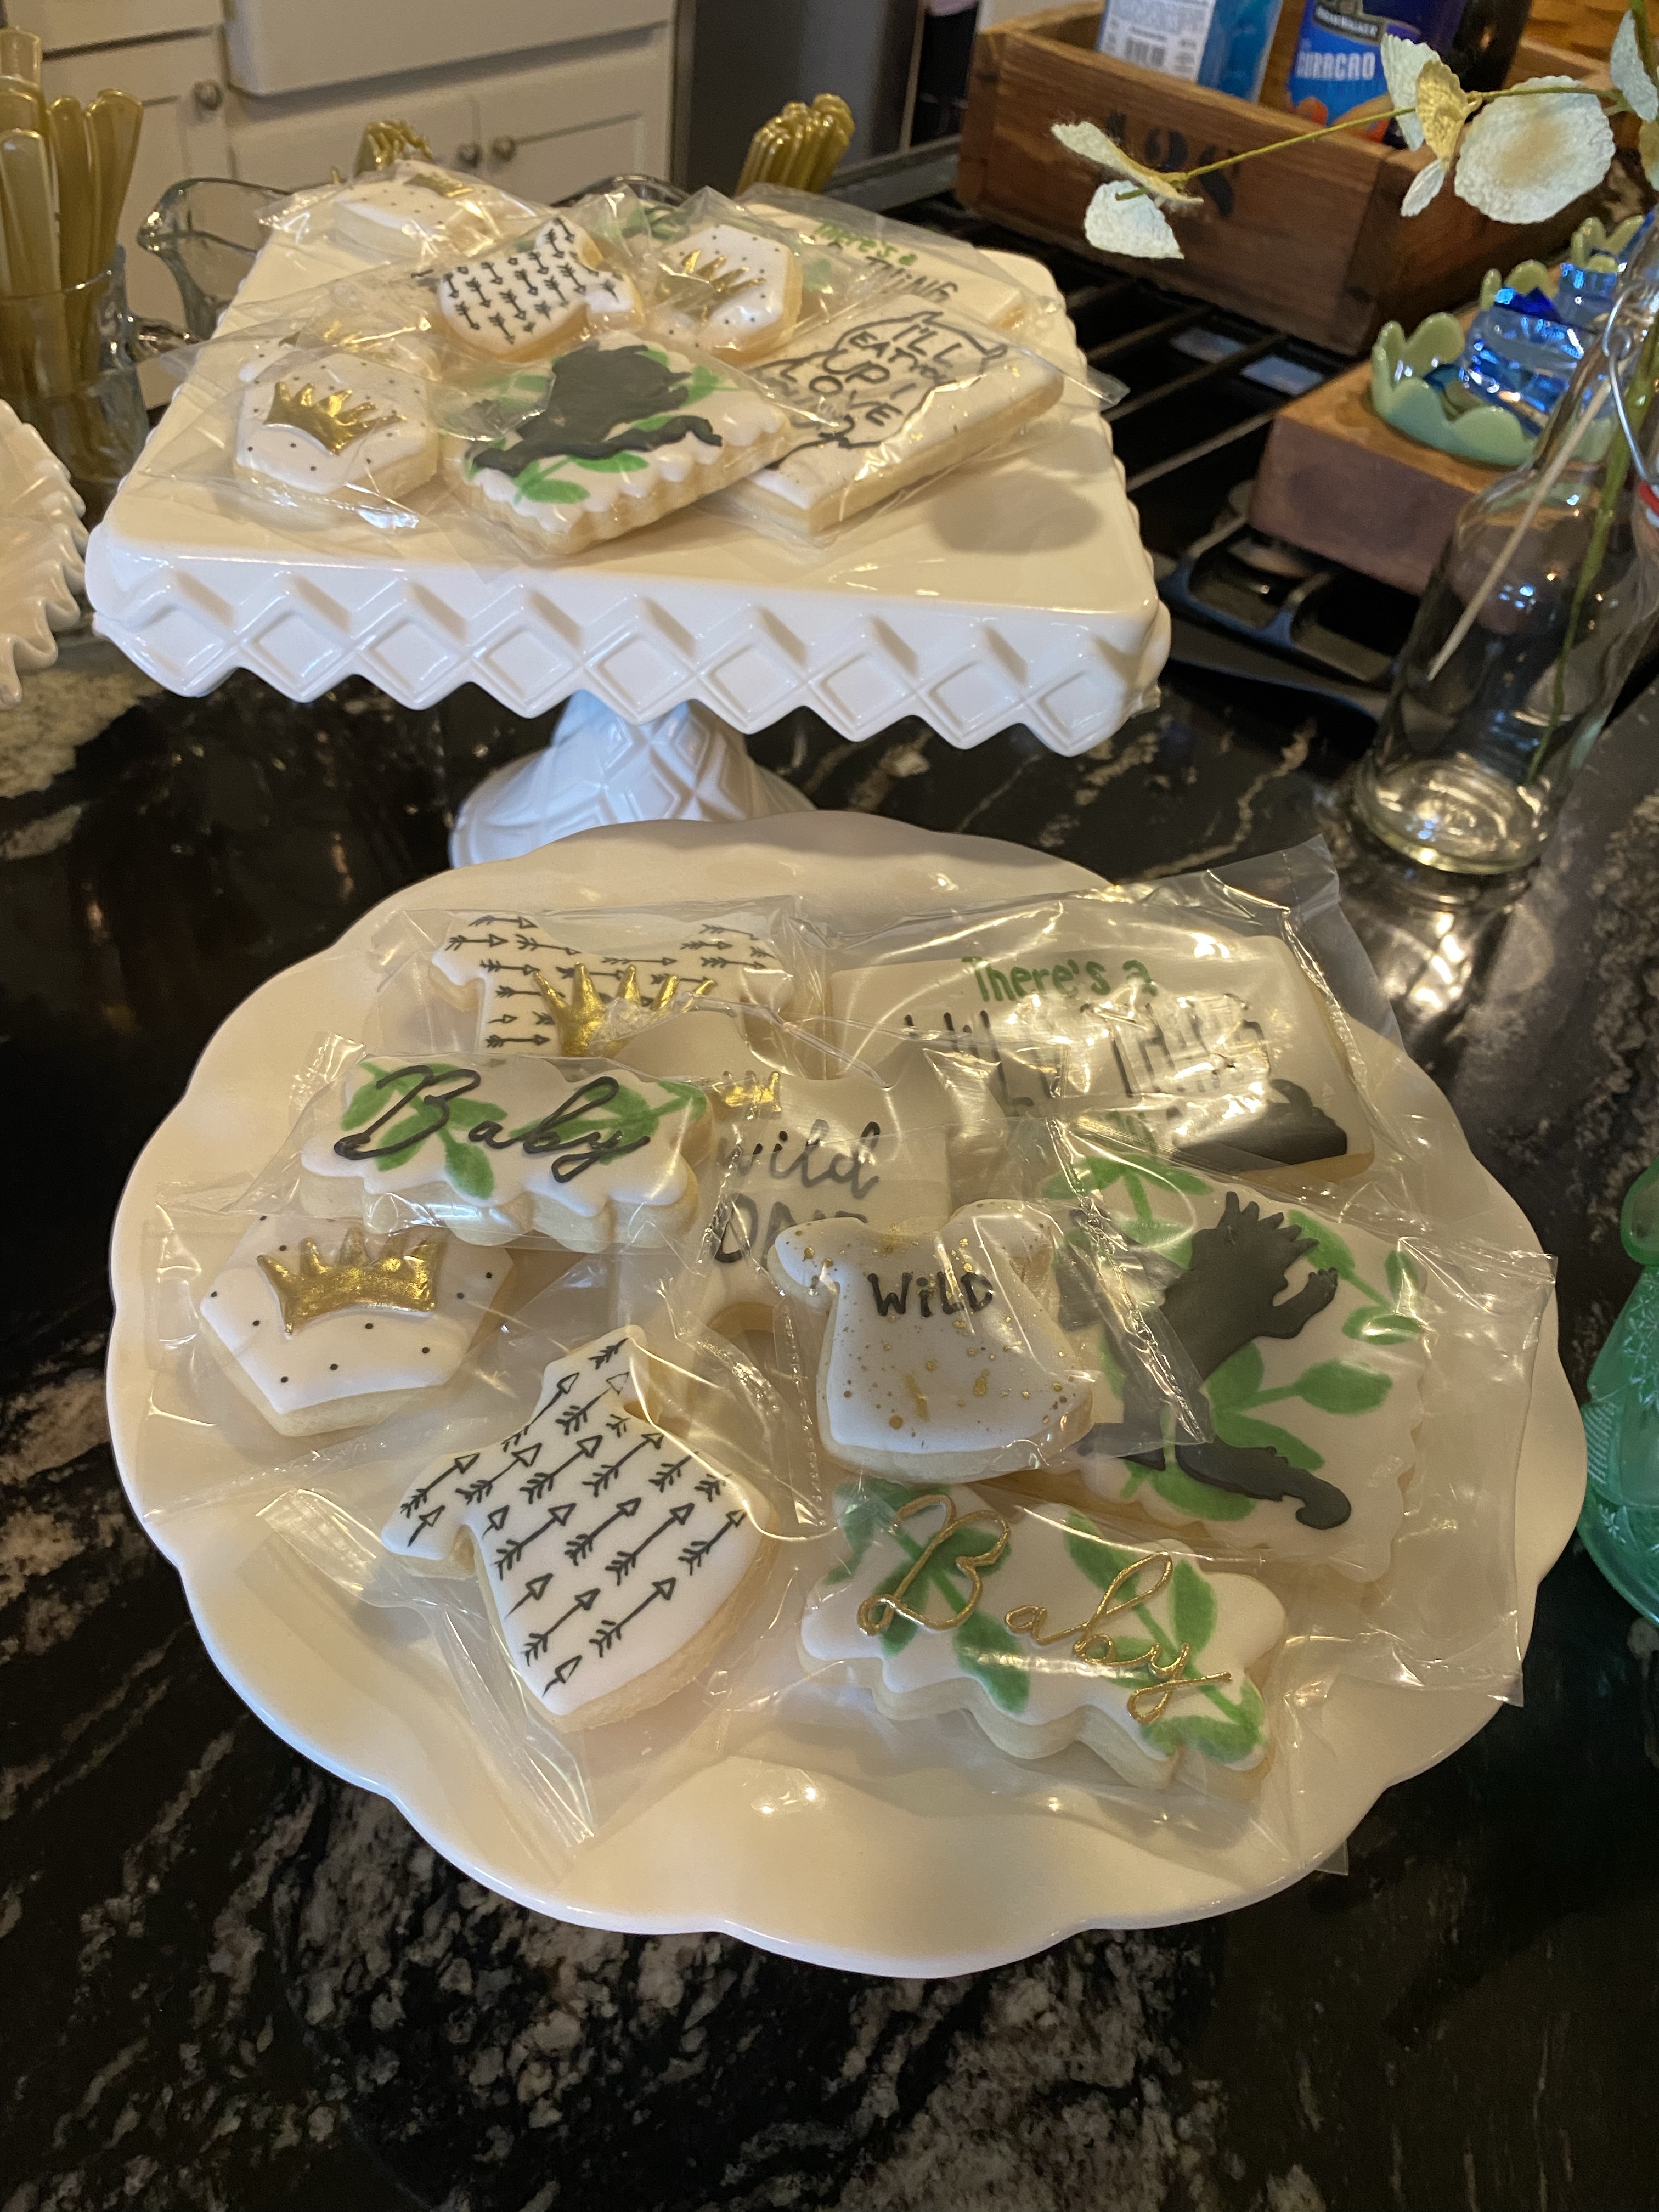
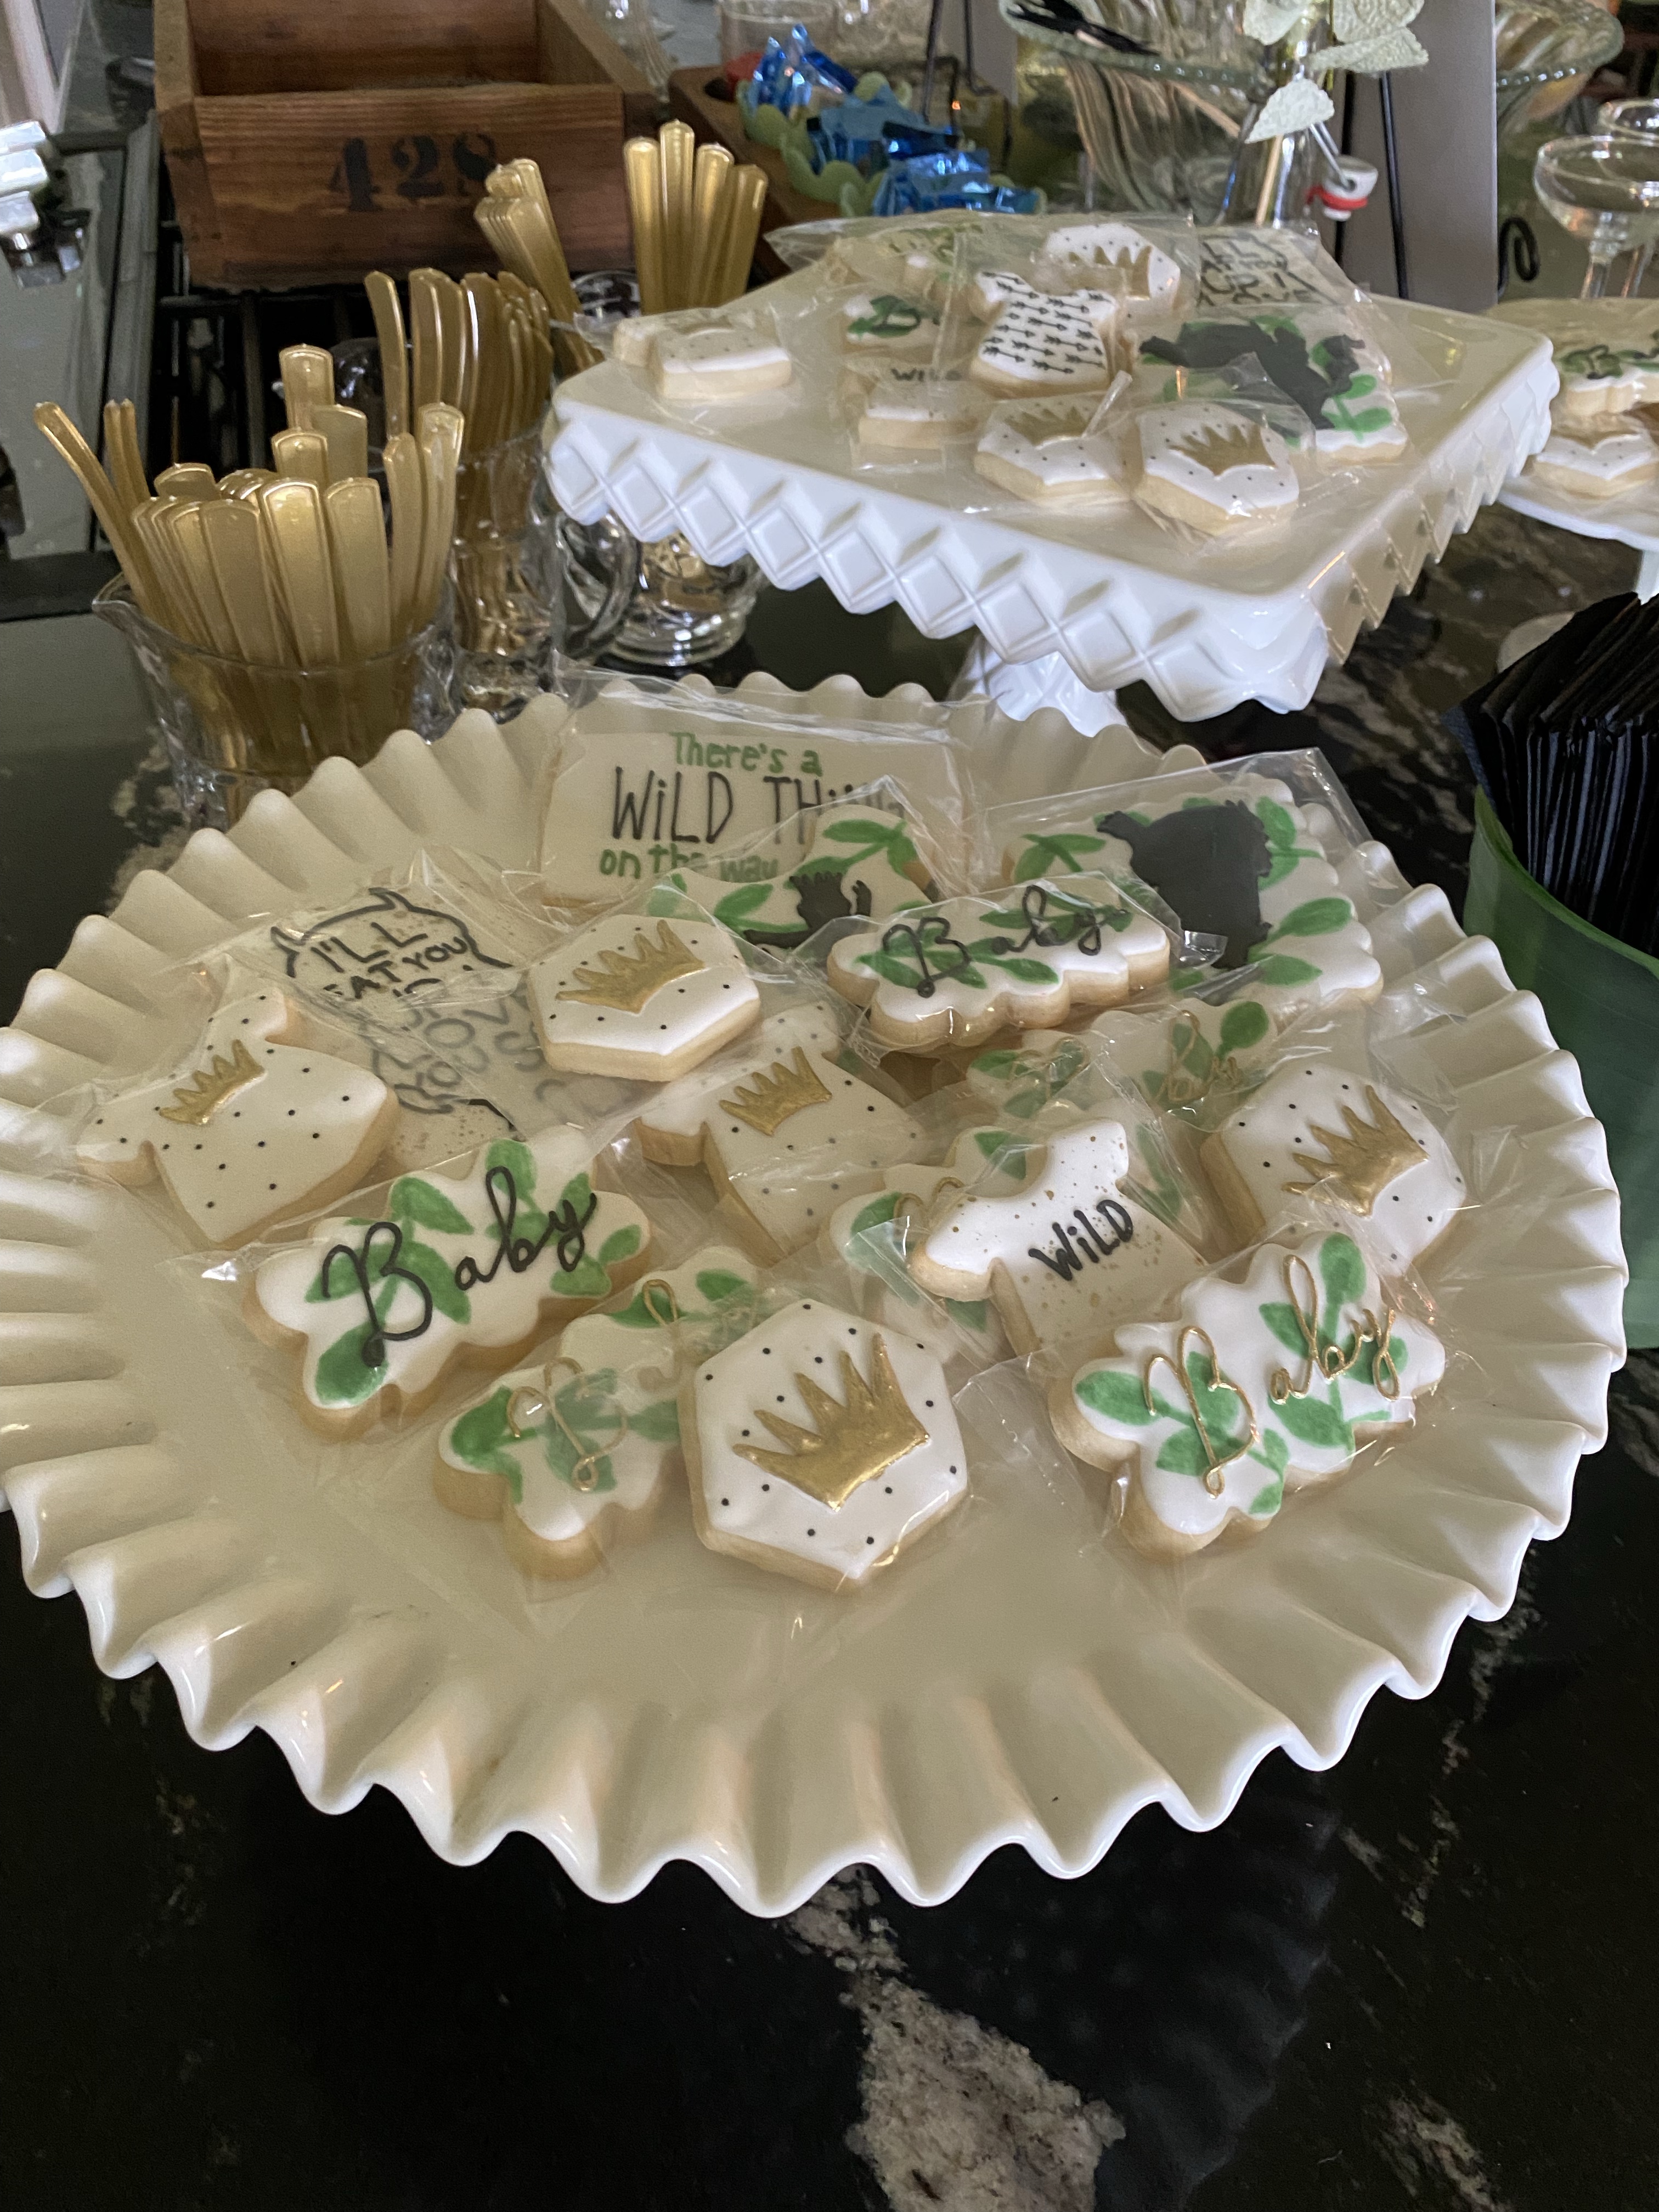
The cookies were prepared by a local entrepreneur especially for the shower. They were served on my milk glass cake plates. Although I keep and use these for all types of parties and holidays, you can also buy these fairly inexpensively at flea markets or thrift stores. I like to use different sizes for visual impact!

The large punch bowl was used to serve non-alcoholic bottled drinks packed in ice. Surprisingly, I do sell a fair number of punch bowls at the Big Red Barn and the Stillwater Antique Mall. Consider buying one if you see it. They have a lot of uses for holidays, parties, etc. For example, I have used mine at Christmas filled with vintage Christmas tree balls! You could fill it with candy, Easter eggs, or use your imagination! Again, a relatively inexpensive item with a lot of uses.

It was lots of fun hosting a party again! I found myself a little out of practice, but it was fun to find pieces to use that are inexpensive, flexible, and easy to use! Use your imagination when you’re exploring flea markets, garage sales, or antique malls!

Jackie

Collecting, Cooking

Cast Iron Cooking

There’s nothing like cooking with a piece of vintage/antique cast iron. I use my Griswold cast iron skillet several times a week. It has a lid that you can use as an additional skillet, or as a cover if you need to finish cooking an item in the stove or on the range. I also have a small Griswold Dutch oven that I use for beans, stews, and soups. You cannot beat the taste of anything cooked in cast iron. These were probably made in the 1930s or 1940s.

My husband and I buy, sell, and keep a lot of cast iron. It is a primitive collectible that has maintained it’s value and actually continues to grow in popularity and price. I cannot keep enough in stock at my booth in the Stillwater Antique Mall.

The two biggest manufacturers of cast iron cookware during the late 19th and 20th century were either Griswold or Wagner Ware. Both made great cast iron skillets, Dutch ovens, griddles, roasters, corn pans, scotch bowls, monk pans, bread pans, sauce pans, and more!! Take some time to look up these pieces of cast iron to see how they were used. I prefer Griswold, because I think it has a slight edge in the casting process.

I am often asked how you can tell old/antique cast iron from newer pieces. Honestly, you can just tell by looking at it and feeling it. The casting in old pieces is very smooth and not pitted. Look at how smooth the inside of the skillet(s) are below. Also, the exterior of the cast iron pieces provide a lot of information. The numbers, logo, and descriptions provide a lot of great information. You can look on Google or in reference books to find more about your piece.

There were also several lesser know cast iron manufacturers who made equally impressive pieces of cast iron. Favorite, Martin Stove Company, and Crescent come to mind. In my opinion, their pieces are just as well made as the “big two” and are priced similarly.

I make fajita meat, blackened chicken, fish, steaks, pork chops, and pretty much everything in my cast iron skillet. I love that you can cook something on top of the stove, then just place it into the oven to continue the cooking process.

A cast iron skillet must be well seasoned and cleaned. My husband is an expert in cast iron cleaning/seasoning. He takes the grittiest, dirtiest, piece of cast iron and it comes out as smooth and clean as the day it was made.

See if you can find an older piece of cast iron to use and try some of your favorite recipes. I think you’ll be pleasantly surprised with the outcome!

Jackie

Cooking

Homemade Decorated Christmas Cookies

Well, it is finally here, the week of Christmas! Growing up, this was the best week of the year. You were out of school, got to snuggle up and watch all of your favorite Christmas movies, and of course decorate Christmas cookies. Now when I was younger (and I would say up until a few years ago) I was not very good at decorating, but they still tasted delicious! I’m going to share our cookie recipes and a few decorating tips for the person who isn’t great at cookie decorating!

This dough is perfect for rolling out and using cookie cutters. We like to go with cutouts we know will be less intricate and thus easier to decorate. This year we chose to do mittens, snowflakes, sweaters, trees and stockings. It’s always good to choose cutouts that can have one solid base color for ease of decorating.

Next you pop them in the oven. You want to keep an eye on them because you don’t want them to burn and you don’t want them to be under done. You are going for golden brown edges on your cookies. Once you’ve reached golden perfection it’s time to take them out and let them cool. We like to use cooling racks so air can flow around the entire cookie.

Now that the cookies have cooled it’s time to decorate. We make the icing before making the dough so it has time to firm up. To get the base color on the cookies we first make an outline around each cookie. Once you’ve outlined all of the cookies your icing will have thinned a little to be able to flood the outline with icing. Let the outline sit for about ten minutes to firm. If the icing isn’t thin enough to flood you can add a little hot water to the icing or set the bottles in the hot water for a few minutes. Flooding the icing will give a nice glazed look to your cookie.

The next step is putting some detail on your cookies. You can of course use icing but you may want to grab a few other things such as sprinkles and other candies. This year they had a fun collection of sprinkles which helped make our cookies pop!

Now for the recipes! We have used this cookie recipe for over 30 years but the icing recipe we found on Pinterest. We provide both below:

Christmas Cookie Recipe:

  • 1 Cup softened butter
  • 1 1/2 Cups confectioners sugar
  • 1 egg
  • 1 tsp vanilla
  • 1/2 tsp almond extract
  • 2 1/2 Cups all purpose flour
  • 1 tsp baking soda

Mix butter, sugar, egg, vanilla and almond extract throughly. Blend in flour and baking soda. Cover, chill 2-3 hours. Heat oven to 375 degrees. Divide dough in half. Roll each half 1/4 inch thick on lightly floured surface. Cut into desired shapes. Place on lightly greased cookie sheets. Bake 7-8 minutes or until light brown on edge.

Icing recipe:

  • 1 Cup confectioners sugar sifted
  • 2 Tbs milk
  • 1 Tbs light corn syrup
  • 1 drop lemon juice

Mix all ingredients thoroughly. If the icing is too thick continue to add milk a teaspoon at a time until you reach desired consistency. Add gel food coloring and stir. Funnel the icing into squeeze bottles for ease of decorating.

Here they are all ready for Santa to come! This has been a wonderful tradition in our family for many years and will be for years to come. We would love to hear about some of your most cherished traditions!

Happy Holidays,

Cristie

Cooking

Grandma’s Pecan Pie

My grandma was known for many of her dishes but, her pecan pie was definitely top of the list. My most treasured memories with her took place in the kitchen. We would make candy at Christmas time, fried chicken in the summer, her famous noodles for every holiday and pecan pie at thanksgiving. Growing up her parents owned a cafe in Glencoe, Oklahoma. Everyday my grandmother and her sister would make pies for the cafe before going to school. She was great at making all kinds of pies but, my favorite was her pecan pie.

When she passed I was given her recipe box, which was a mix of her hand written recipes, her friends recipes, some that were cut out of newspapers and magazines. I also received her recipe book she received as a wedding present in the 1940’s and one of her rolling pins. Her pie crust recipe, which I use, was from her friend Patsy. It yields several pie crusts so I imagine they would bake many pies at a time. The pecan pie was her recipe and I’ll share both the crust and pie recipe with you below along with the instructions.

Here are the original recipe cards ❤️

Patsy’s Pie Crust Recipe: (yields 2 large pie crusts)

  • 3 1/2 cups of all purpose flour
  • 2 cups Crisco (vegetable shortening)
  • 2 1/2 Tbs white syrup (light corn syrup)
  • 1/2 cup water
  • 1 tsp salt

Instructions:

  1. I use my KitchenAid mixer with the dough hook attachment. Sift flour and salt together then attach bowl to your KitchenAid mixer.
  2. Turn on mixer and add in the Crisco and white syrup
  3. Start by adding 1/4 of a cup of the water. Add the rest of the water slowly until you get a consistency that sticks together but not to the bowl.
  4. Divide the dough into 2 even balls. If you are not using both immediately you can freeze in a Ziplock bag until ready to use. When ready to use pull out of freezer and let thaw in the refrigerator over night.
  5. Sprinkle flour on the countertop and place a ball of dough on the flour. Sprinkle the ball with flour and begin to roll out.
  6. You will roll out to 1/8 of an inch and place in a pie pan.
  7. Pinch around the edges then trim your crust.
Make sure you get as much air out of the bag before sealing and placing in the freezer

It’s nice to have extra dough to trim so you can make it even all the way around

Grandma German’s Pecan Pie: (enough for 1 pie)

  • 1 cup light corn syrup
  • 1 cup dark brown sugar
  • 1/3 cup melted butter
  • 1 heaping cup of shelled pecans
  • 3 whole eggs
  • A dash of vanilla
  • Pinch of salt

Instructions:

  1. Preheat oven to 350 degrees
  2. Mix all ingredients except pecans well with a hand mixer
  3. Add in pecans and stir to combine
  4. Pour into pie shell
  5. Put a pie shell shield over the crust and bake for 40-50 minutes
  6. Check on pie about 20 minutes in. You may need to remove the shell shield if the crust is not browning
  7. Remove from oven and let cool
We have several pecan trees on our property that produce native pecans. If you don’t you can buy them from a local pecan farmer
A pie crust shield can be a life saver so your pie can cook in the middle and not burn on the outside
Finished product 😍

I hope this recipe finds its way into your kitchen this year. I wish you all a happy and safe Thanksgiving!

– C