Christmas is a magical time of year. It’s hard not to get excited when December rolls around. I actually don’t even have to wait for December as I always think about my Christmas wrapping theme months in advance. I like to think about it early so I can pull all of the pieces in to create a beautiful theme that everyone can enjoy! You can do this too with a few easy steps.
You will start by picking out a wrapping paper. This year I went with a hunter green paper with gold deer, white snowflakes and trees in a lighter green. I purchased this at Sams Club. Now if you know anything about Sam’s Club it is that they have very large quantities. Their wrapping paper is no exception. With wrapping paper in this amount you will only have to buy one roll of your main paper.
Next you will want to pick out the accessories. You should pick a second basic wrapping paper, gift bags, tags, tissue paper and ribbon. You can get them at any super market or craft store or buy online. This year I went with a simple white paper, white and gold tags, gold and green tissue paper, white and gold bags and a variety of gold ribbons. You can experiment with different types of bows and other ways to use your ribbon.
Finally, you just start putting everything together and place the gifts under the tree. I thoroughly enjoy watching my loved ones open the gifts I have wrapped just for them. I hope I have sparked a little creativity in you to inspire your own wrapping theme!
Thanksgiving is just around the corner and that puts me in the mood to share some recipes with all of you. One of our families favorite food for most holidays is my grandmas homemade egg noodles. I have shared her pecan pie recipe with you which is delicious but her noodles are quite literally the best around. Once she passed I worked on getting the technique down for years until I finally got as close as I’m going to get. So lets get started!
You will start by making the dough. You will want to start this process at least the day before as the noodles need time to dry out. Begin by putting the flour in a large bowl. You will then make a crater in the flour where you will add your salt, milk and eggs. Using your hands start folding the flour into the egg mixture. This can get sticky so you may want to flour your hands throughout this process. Once you are able to get it all combined shape it into a ball and leave it in your bowl. You will want to cover this with a warm towel and let it set out for an hour.
Next you will start rolling out your dough onto a floured surface and top it with flour as well. You will want to get this really thin. I enlist the help of my husband because it can get pretty tiring on your own. Once the dough is rolled out you will want to flour the top as well so your dough doesn’t stick to your rolling pin.
Now that you have your dough rolled out you will want to cut it into noodles. I used to cut them using a knife which became very tedious. I jumped online and found what I think is a pasta cutter. You can adjust it to the width you want so when you are done cutting them vertically you can adjust it to the width you want and cut them horizontally.
Above is the finished product. You can cut them however wide or long you want. This size seems to work for me. You will now toss them in flour and spread them out. The noodles will now be drying out for the next several hours to a day.
When you are ready to make the noodles make sure and give yourself a couple of hours. I like to bake a small whole chicken to add juices and meat to the noodles. You can start the noodles when you have about an hour left on the chicken or turkey. You will start with a pot of chicken stock brought to a boil. You will gently add your noodles to the boiling water. As they cook make sure and stir them frequently. You will add in the juices and meat from the bird while the noodles are cooking. You will want to cook them until they are a thick consistency and not too soupy. I usually cook them 2-3 hours.
Noodles:
2 cups flour
1 tsp salt
2 eggs
3 Tbs milk
This is for a single batch. I typically do a triple batch because my family can’t get enough of them! You can play around with the milk. If your dough is too dry and crumbly you will want to add a little at a time until you get the right consistency.
We always put these over mashed potatoes except for my sister who oddly just puts them in a bowl and eats them. I hope your family enjoys this recipe as much as mine has all of these years!
My husband and I are expecting a baby in a few short weeks! We have been very fortunate to have a couple of baby showers and a diaper party. Needless to say we needed a way to say thank you for the generosity of our friends.
I love to bake so I thought it would be fun to say thank you with some baked goods. For my husband’s diaper party I put together these packs of cookies and tied a themed thank you note to each one. I made some chocolate chip, peanut butter and snickerdoodle cookies to have a variety. I threw them in a basket so they could double as a dessert. They went over really well and we even had a few leftovers to snack on later!
Now for a baby shower I had at work I made these chocolate chip cheesecake bars because they love them and always want me to make them! I also made some bigger packs with my homemade salsa and Starbucks for the ones who planned the shower. Our nursery theme is Where the Wild Things Are so I bought these printable themed labels to make them extra cute.
I am a big believer in showing appreciation when someone does something nice for you. Baking treats gives me a fun way to say thank you. I encourage you to find your unique way of saying thank you to those you care about!
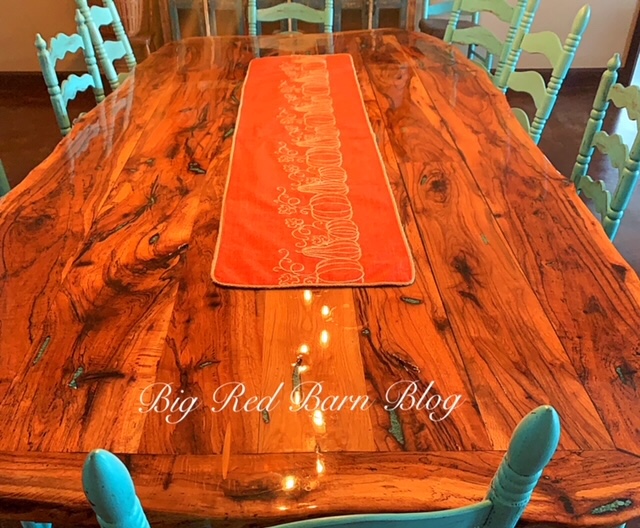
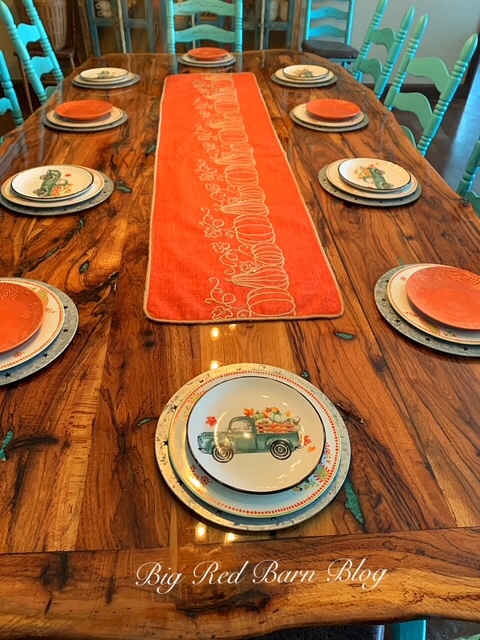
Fall is my favorite season of all! It may be the weather, Halloween, Thanksgiving or my birthday that make this season special but I look forward to it every year. I particularly love to decorate for this time of year. There is always a ton of different themes to choose from and endless supply at the stores. Here I will show you how I decorated my table this year.
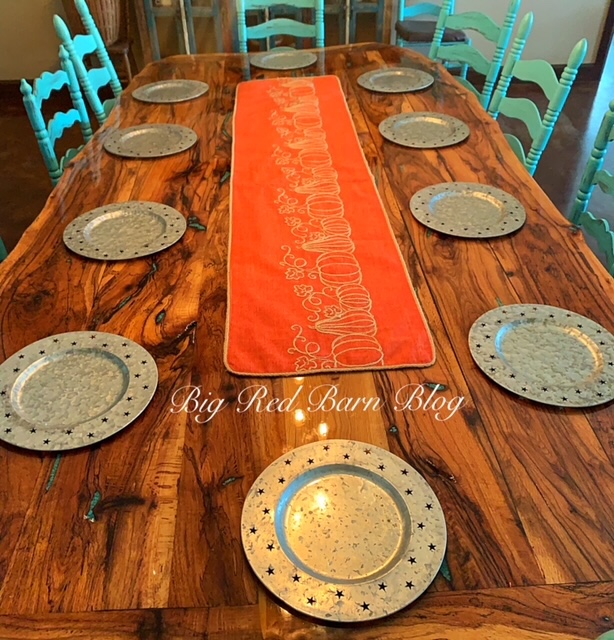
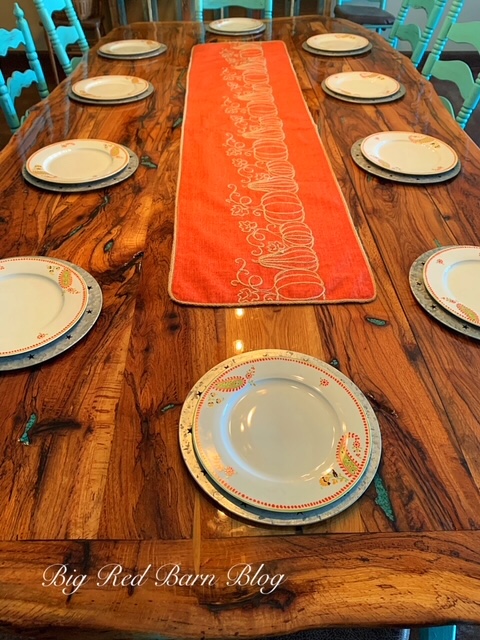
I always start with a freshly cleaned table. I love looking at this table when it is clear of everything and the wood grain stands out. Once I’ve cleaned the table and had ample amount of time to look at it I head to my closet to pick out my table runner. I have a ton of table runners for every holiday. I place that on the table and then put the chargers at each seat. I have ten chairs at the moment but I always buy enough place settings for twelve in case we have a full house. Once I have placed the chargers I put a main course plate down then top it with a salad plate. I will put flatware out the day of the meal.
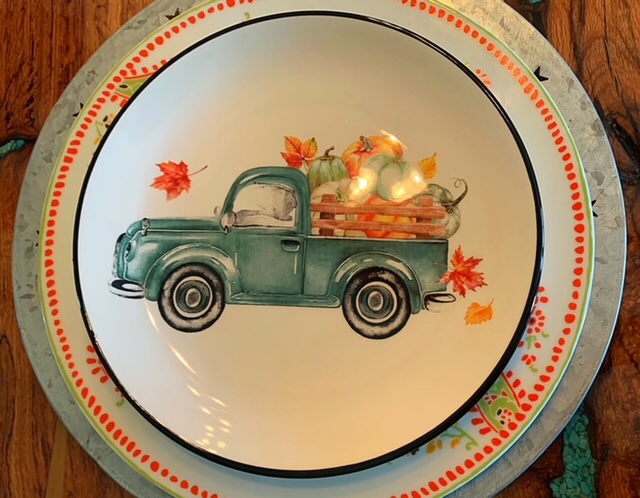
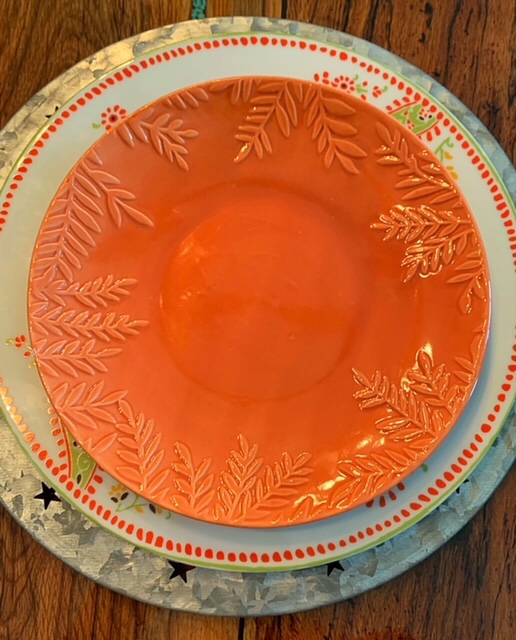
I look forward to picking out my salad plate for each season. This year I went with a combination of a fall truck scene and a perfect solid orange color. I feel like these plates bring the whole thing together!
Next I start to build the center of the table. I changed out the flowers from my summer table to some fall foliage. I then placed my Pioneer Woman cake stand on the runner to pull in some of the turquoise from the smaller pumpkins on the table and that is the color of the chairs as well. I have a variety of other pumpkins to fill out the table but this year I bought these galvanized pumpkins to add a farmhouse touch.
There you have it! Once you have a few key pieces it become easy to put it all together. I hope you all have as much fun getting ready for Fall as I do!