Most of my posts are recipes. This is because so many of my favorite memories are tied to recipes and time spent in the kitchen. This brownie recipe is my grandmas. She would always make these when we would go on trips for softball or basketball games. Everyone would always enjoy these on our way out of town and it created such great memories for me.
These days I use this recipe for treats to take to work for our staff, desserts for a party or for bake sales. This time I made these for a treat for team members who took a quiz over our monthly features. This recipe typically calls for chocolate chips but I chose to put M&M’s in this batch. You can pick many different candies to put in these to make it something special for you!
Now for the recipe:
Ingredients:
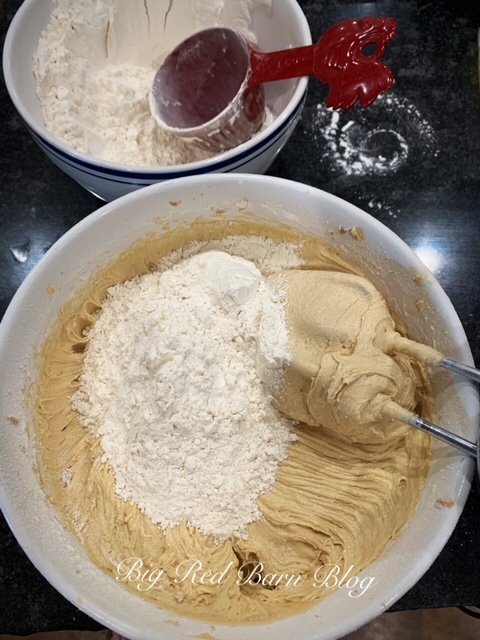
2 2/3 cup flour
2 tsp baking powder
1/2 tsp salt
2/3 cup butter
2 1/4 cup brown sugar
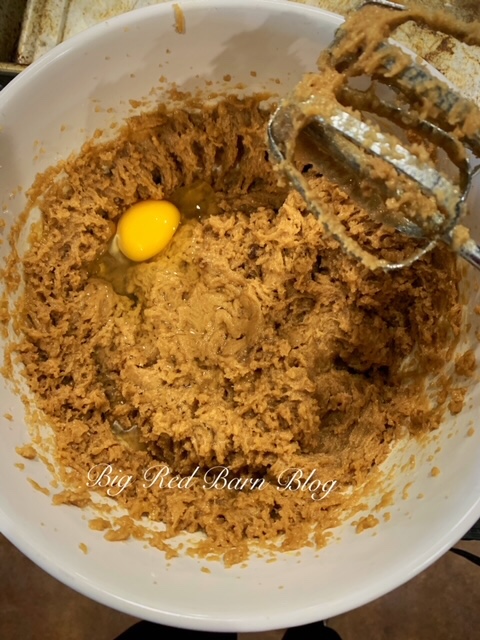
3 eggs
1 cup M&M’s
Instructions:
Preheat oven to 325 degrees
Melt the butter
Mix flour,salt and baking powder together.
Mix butter and brown sugar together then add eggs one at a time.
Add flour mixture and beat until smooth.
Pour into a parchment paper lined baking pan
Sprinkle with M&M’s
Bake for 20-25 minutes
There you have it! These are sure to be a hit at home or your next event!
The one thing we grow the most of in our garden is tomatoes. We spend the summer months canning marinara and salsa which takes a ton of tomatoes. My absolute favorite marinara sauce is this homemade recipe. We use it on pasta, pizza and as dipping sauce. Here we use the same canning process we used when we made the strawberry jam but the whole process takes a little bit longer but is so worth it!
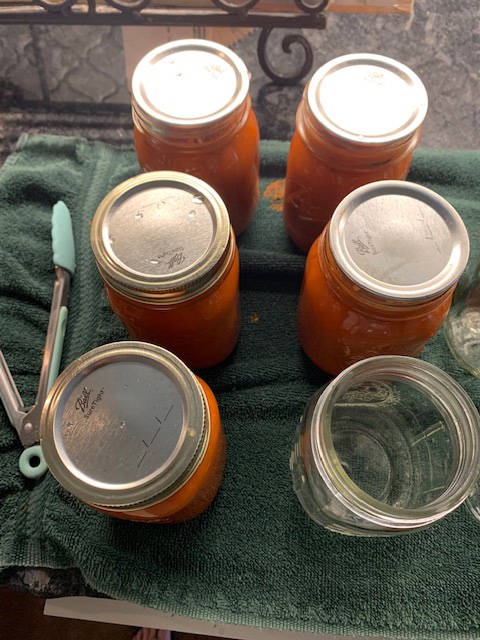
Finished product!
We are ready to make a batch of marinara when we have at least 10 pounds of tomatoes. The full batch calls for 20 pounds but we made a half batch this time. We pick them, weigh and then wash them. The first step is cutting the tomatoes in half and placing them on a parchment paper lined cookie sheet.
We put them into a 400 degree oven for 10 minutes. This will soften them up enough to put through the tomato strainer. The strainer became a game changer for us when canning as it removes the skins and leaves us with just the tomato and its juices. Before we would have to remove the skins by hand which was not ideal as they were very hot.
While the tomatoes are cooking we chop up the onions, bell peppers and basil. Next we place olive oil in the bottom of a thick bottom pot and heat it over medium heat. Next you add the onions and bell peppers and cook for 10 minutes. Then you add in the garlic and cook for 5 minutes. Now it is time to add in all of the tomato juices, salt, pepper, Italian seasoning, sugar and tomato paste. All of the spices are to taste. I will add a good amount in the beginning and then slowly add some throughout the cooking process.
‘
Once all of your ingredients are added bring your pot to a boil. When you have reached a boil turn the heat down to get a good simmer going. Let this simmer for 2 1/2 to 3 hours. In the last 30 minutes add the basil. Once I have added the basil I break out my emersion blender. I prefer a smooth sauce to a chunky sauce so I like to blend the mixture. Now it’s time to place the sauce in the jars.
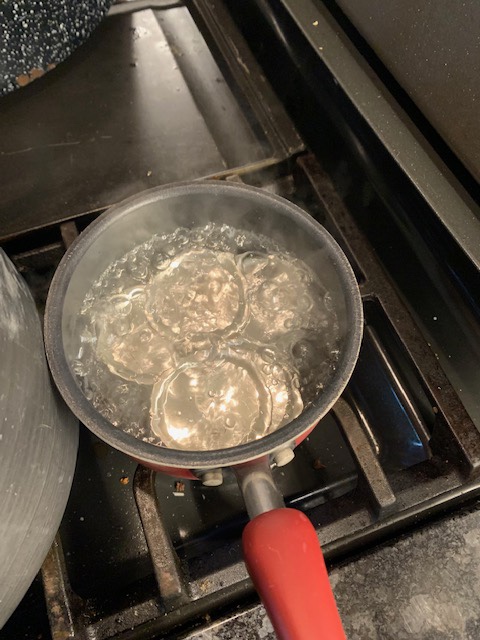
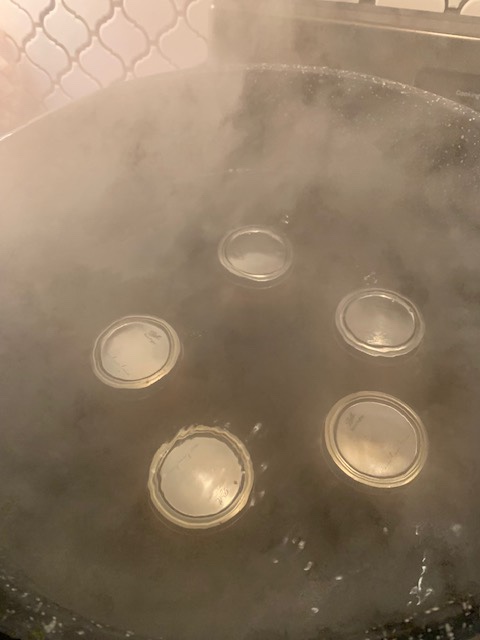
Similar to canning the jam we will boil the lids and place them on the full jars. Then hand tighten the rings on the jars and you are ready to place them in their water bath. You will leave them in their bath for 25 minutes before removing them.
There you have it! Here is the ingredient list:
1/4 cup olive oil
10 pounds of tomatoes
1 large onion
1 green bell pepper
4-6 cloves of minced garlic
2 cans of tomato paste
Salt, pepper, Italian seasoning and sugar to taste
When we moved into our house we bought or made new furniture. One thing we didn’t think of was nightstands. It turns out nightstands are pretty convenient. We went five years without them because we just couldn’t find the right ones. Last spring when the restaurant I work for closed down for six weeks I had some free time. My dad is pretty handy and he was nice enough to help me build these beautiful nightstands that helped complete our bedroom.
We had some scraps of wood from building our table and chandelier that we made into 2 x 2’s. These pieces would be the frame of our nightstands. Once we had all of them cut we started screwing the fronts and backs together. It took a lot of measuring and sanding to get everything to fit perfectly. I definitely wanted a drawer so we left space for that. We then made the drawers and put a latch at the back to keep it in place.
After assembling the nightstands we needed to sift through some of the scraps to find tops. We had to find ones with no holes and that were long and wide enough to cover the nightstands. When we found and cut the perfect tops we had to sand and seal them. While waiting on the tops to dry we stained the bottom frames. My cats loved to curl up in the nightstands until we finished them up!
When the seal and stain was dry we glued the tops to the base and let that dry. I would say it was easy but these took quite a bit of time and effort to get them to look this good. I am so pleased with how they turned out and the fact that we didn’t have to buy anything to make them. There is something that feels good about recycling things you would normally throw out and make them into beautiful pieces of furniture!
This week I had some good friends offer me some strawberries from their garden. They had a ton that they were not going to use so I thought I would can some jam! I love the canning process so any excuse to use it I take full advantage. I am also a huge strawberry jam fan so it was a win win.
First thing when canning is to sanitize your jars. Luckily I have a sanitize setting on my dishwasher so I just popped them in and ran a load. This setting does take some time so make sure and plan that part out ahead of time. Getting your canning bath ready can also take some time so you will want to do that before you start making the jam. My parents gave me this huge graniteware water bath canner and it has been a lifesaver. You will need to fill it with water about two-thirds full and turn the burners on high.
Now it’s time to start making the jam. You need to rinse your strawberries and remove the stems. Next you place them in a bowl and either smash them by hand or use an emulsion blender. I used an emulsion blender because I like a very smooth jam. You will pour the mixture into a stock pot and add your butter and fruit pectin. Bring these ingredients to a boil stirring constantly with a wooden spoon then add your sugar. Bring this mix to a boil again and boil for one minute then remove from the heat. Skim the top of the jam to remove the film.
While you are making the jam you will want to boil a small pot of water and throw your lids in until you are ready to seal the jars. While the lids are boiling start filling the jars with the jam. I use this canning funnel to keep things clean and efficient. Fill each jar leaving about half an inch at the top.
Place a lid on each jar then put a ring on and hand tighten but not too snug. Place each jar in your canning bath and put the lid on. Leave them in the bath for about 15 minutes. Remove from the bath and set on towel. You will hear each jar pop ensuring you that your jar is sealed. Let them cool and enjoy! We love to can and will have several recipes coming your way throughout the year!