Collecting

Christmas & SANTA Collectibles

Vintage Christmas decorations are always popular. And Santa is no exception. One of my first collections was Santa, and it always makes me smile. Vintage or new, they all have a a home with me.

The lighted Santa is a family treasure. My husband can remember him from Christmas as a child. He is celluloid and probably dates from the late 1940s. The celluloid Santas (plastic) are extremely popular and certain ones are hard to find. They can become brittle and fragile over time (due to temperature extremes) and some of the more intricate pieces (skis, packs) can break off. Some people just collect celluloid Santas, and they were extremely popular during the 1940s and 1950s.

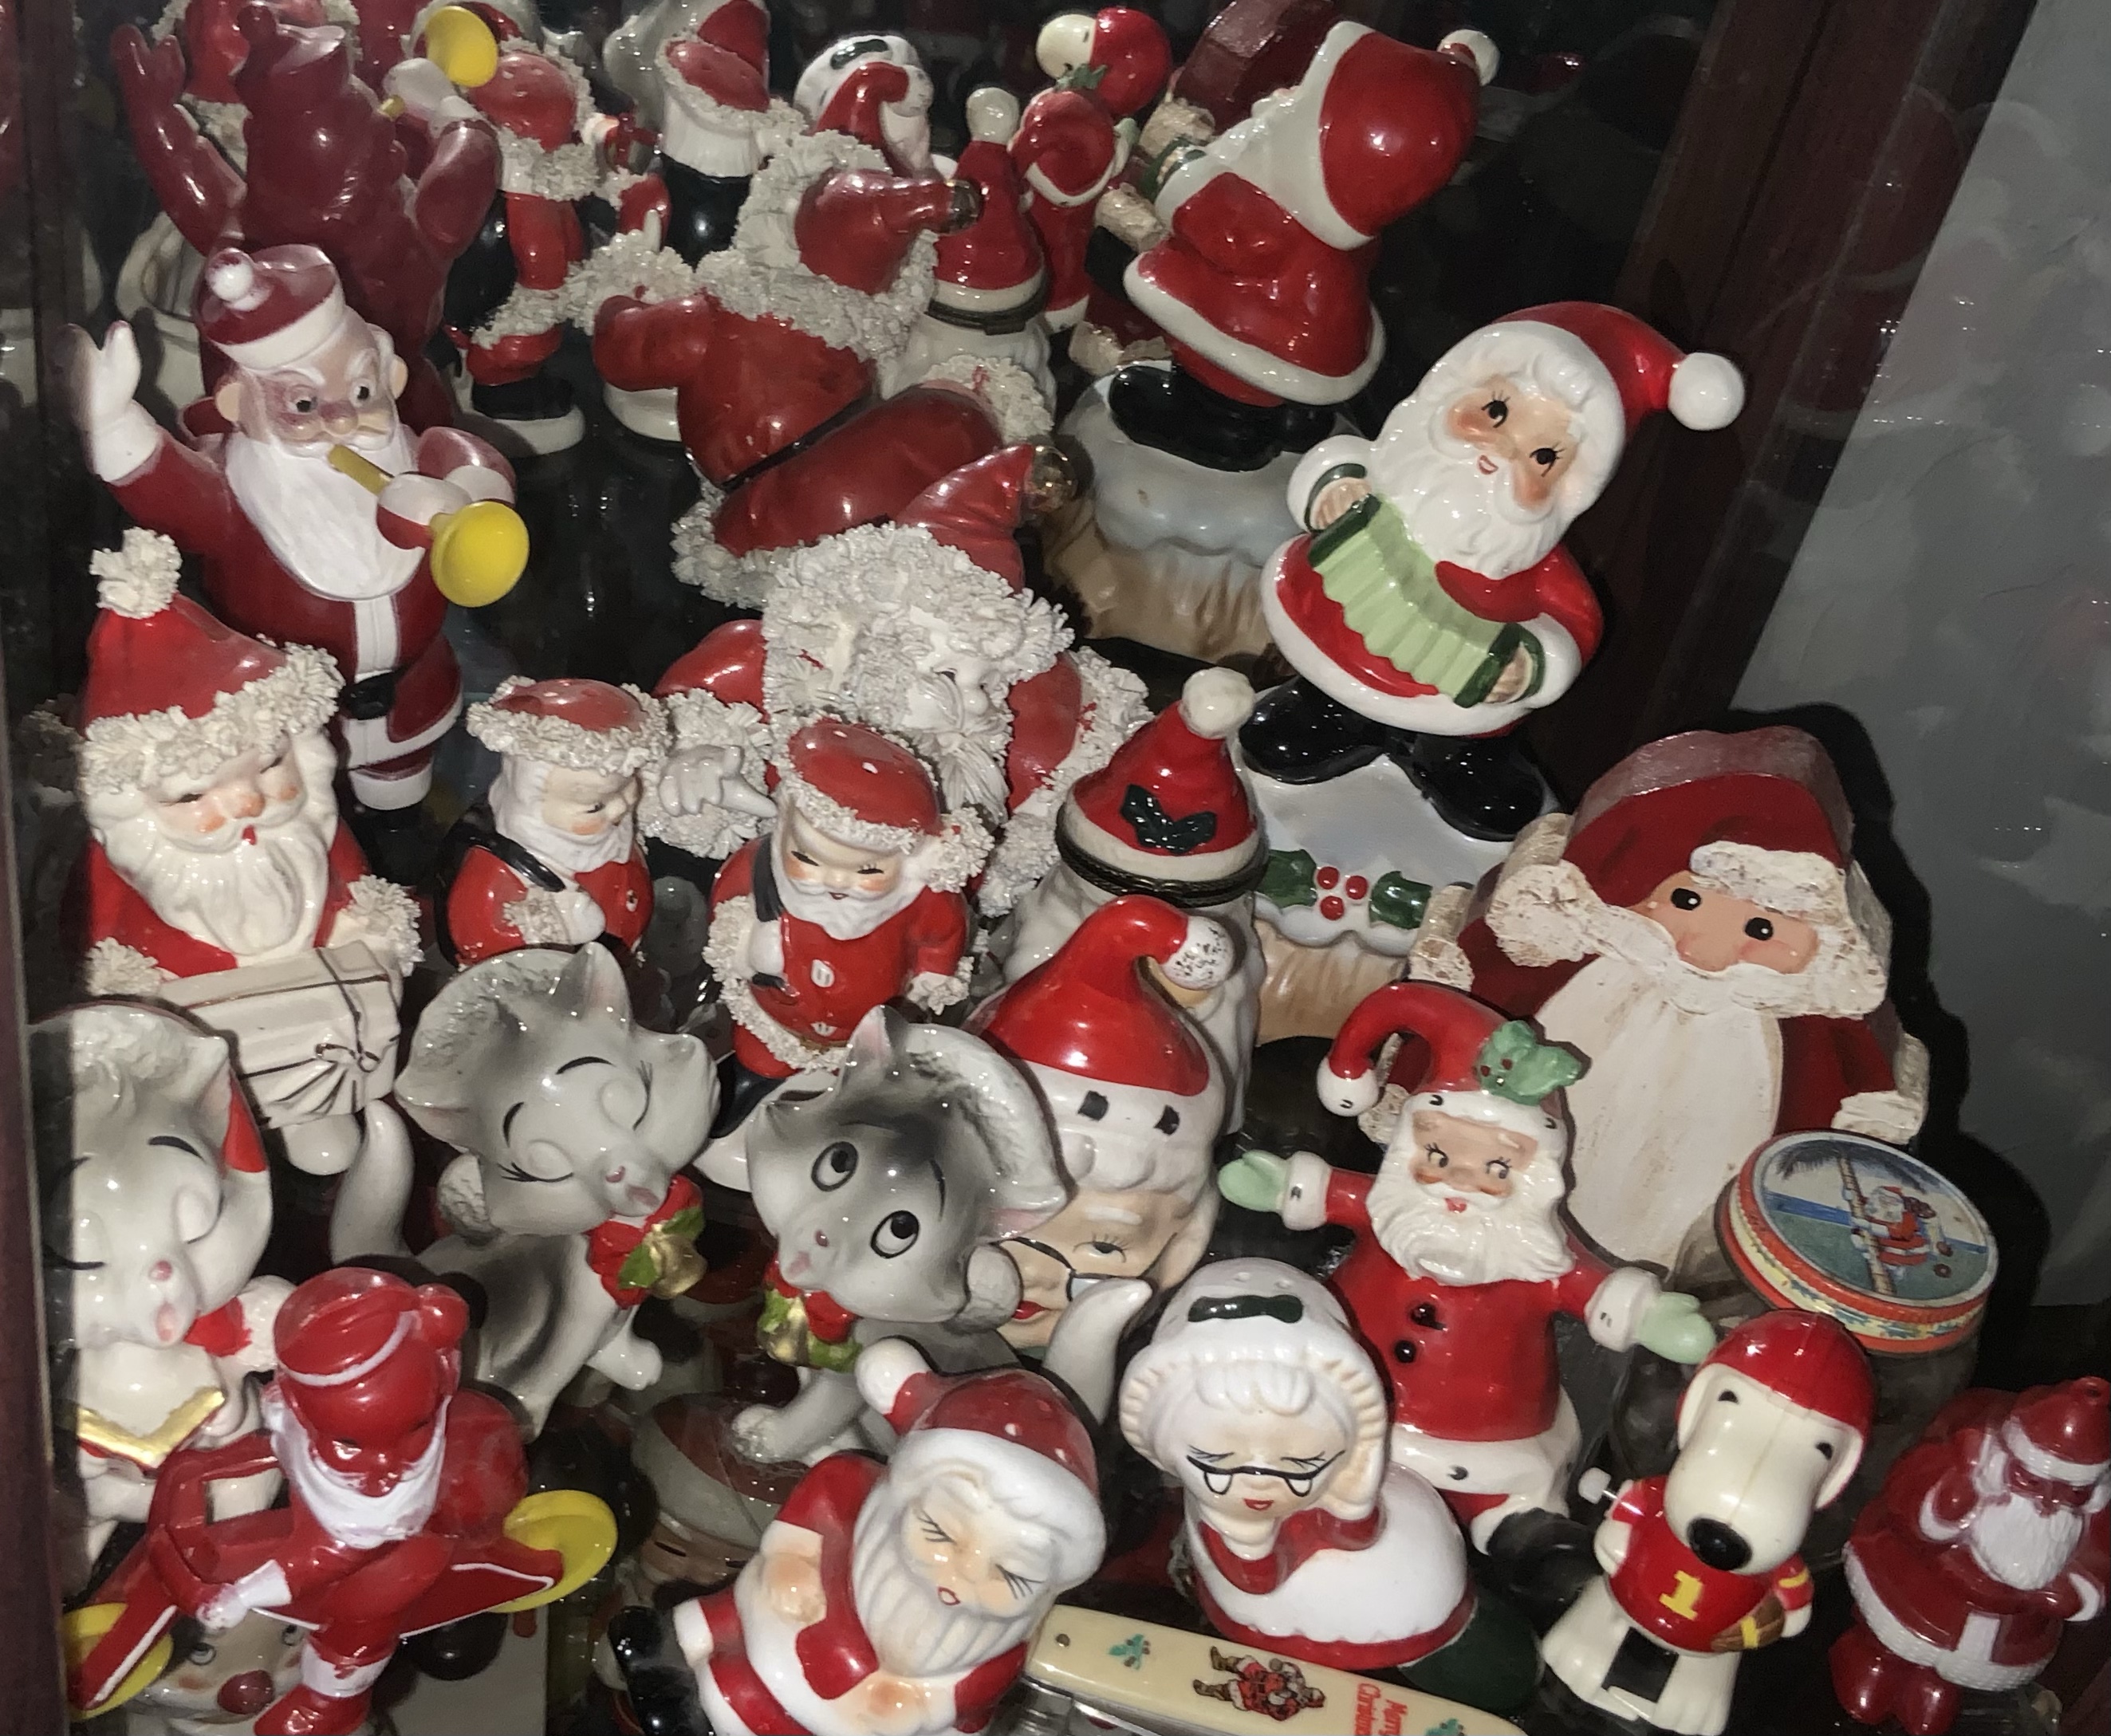
Snoopy and the kissing Clauses are nodders. Nodders are really hard to find, because they’re generally very fragile and usually ended up broken. Their heads are made very thin so they’re able to nod. Kissing Clauses were also popular during the 1960s. They have tiny magnets in their mouths, to help with the attraction!

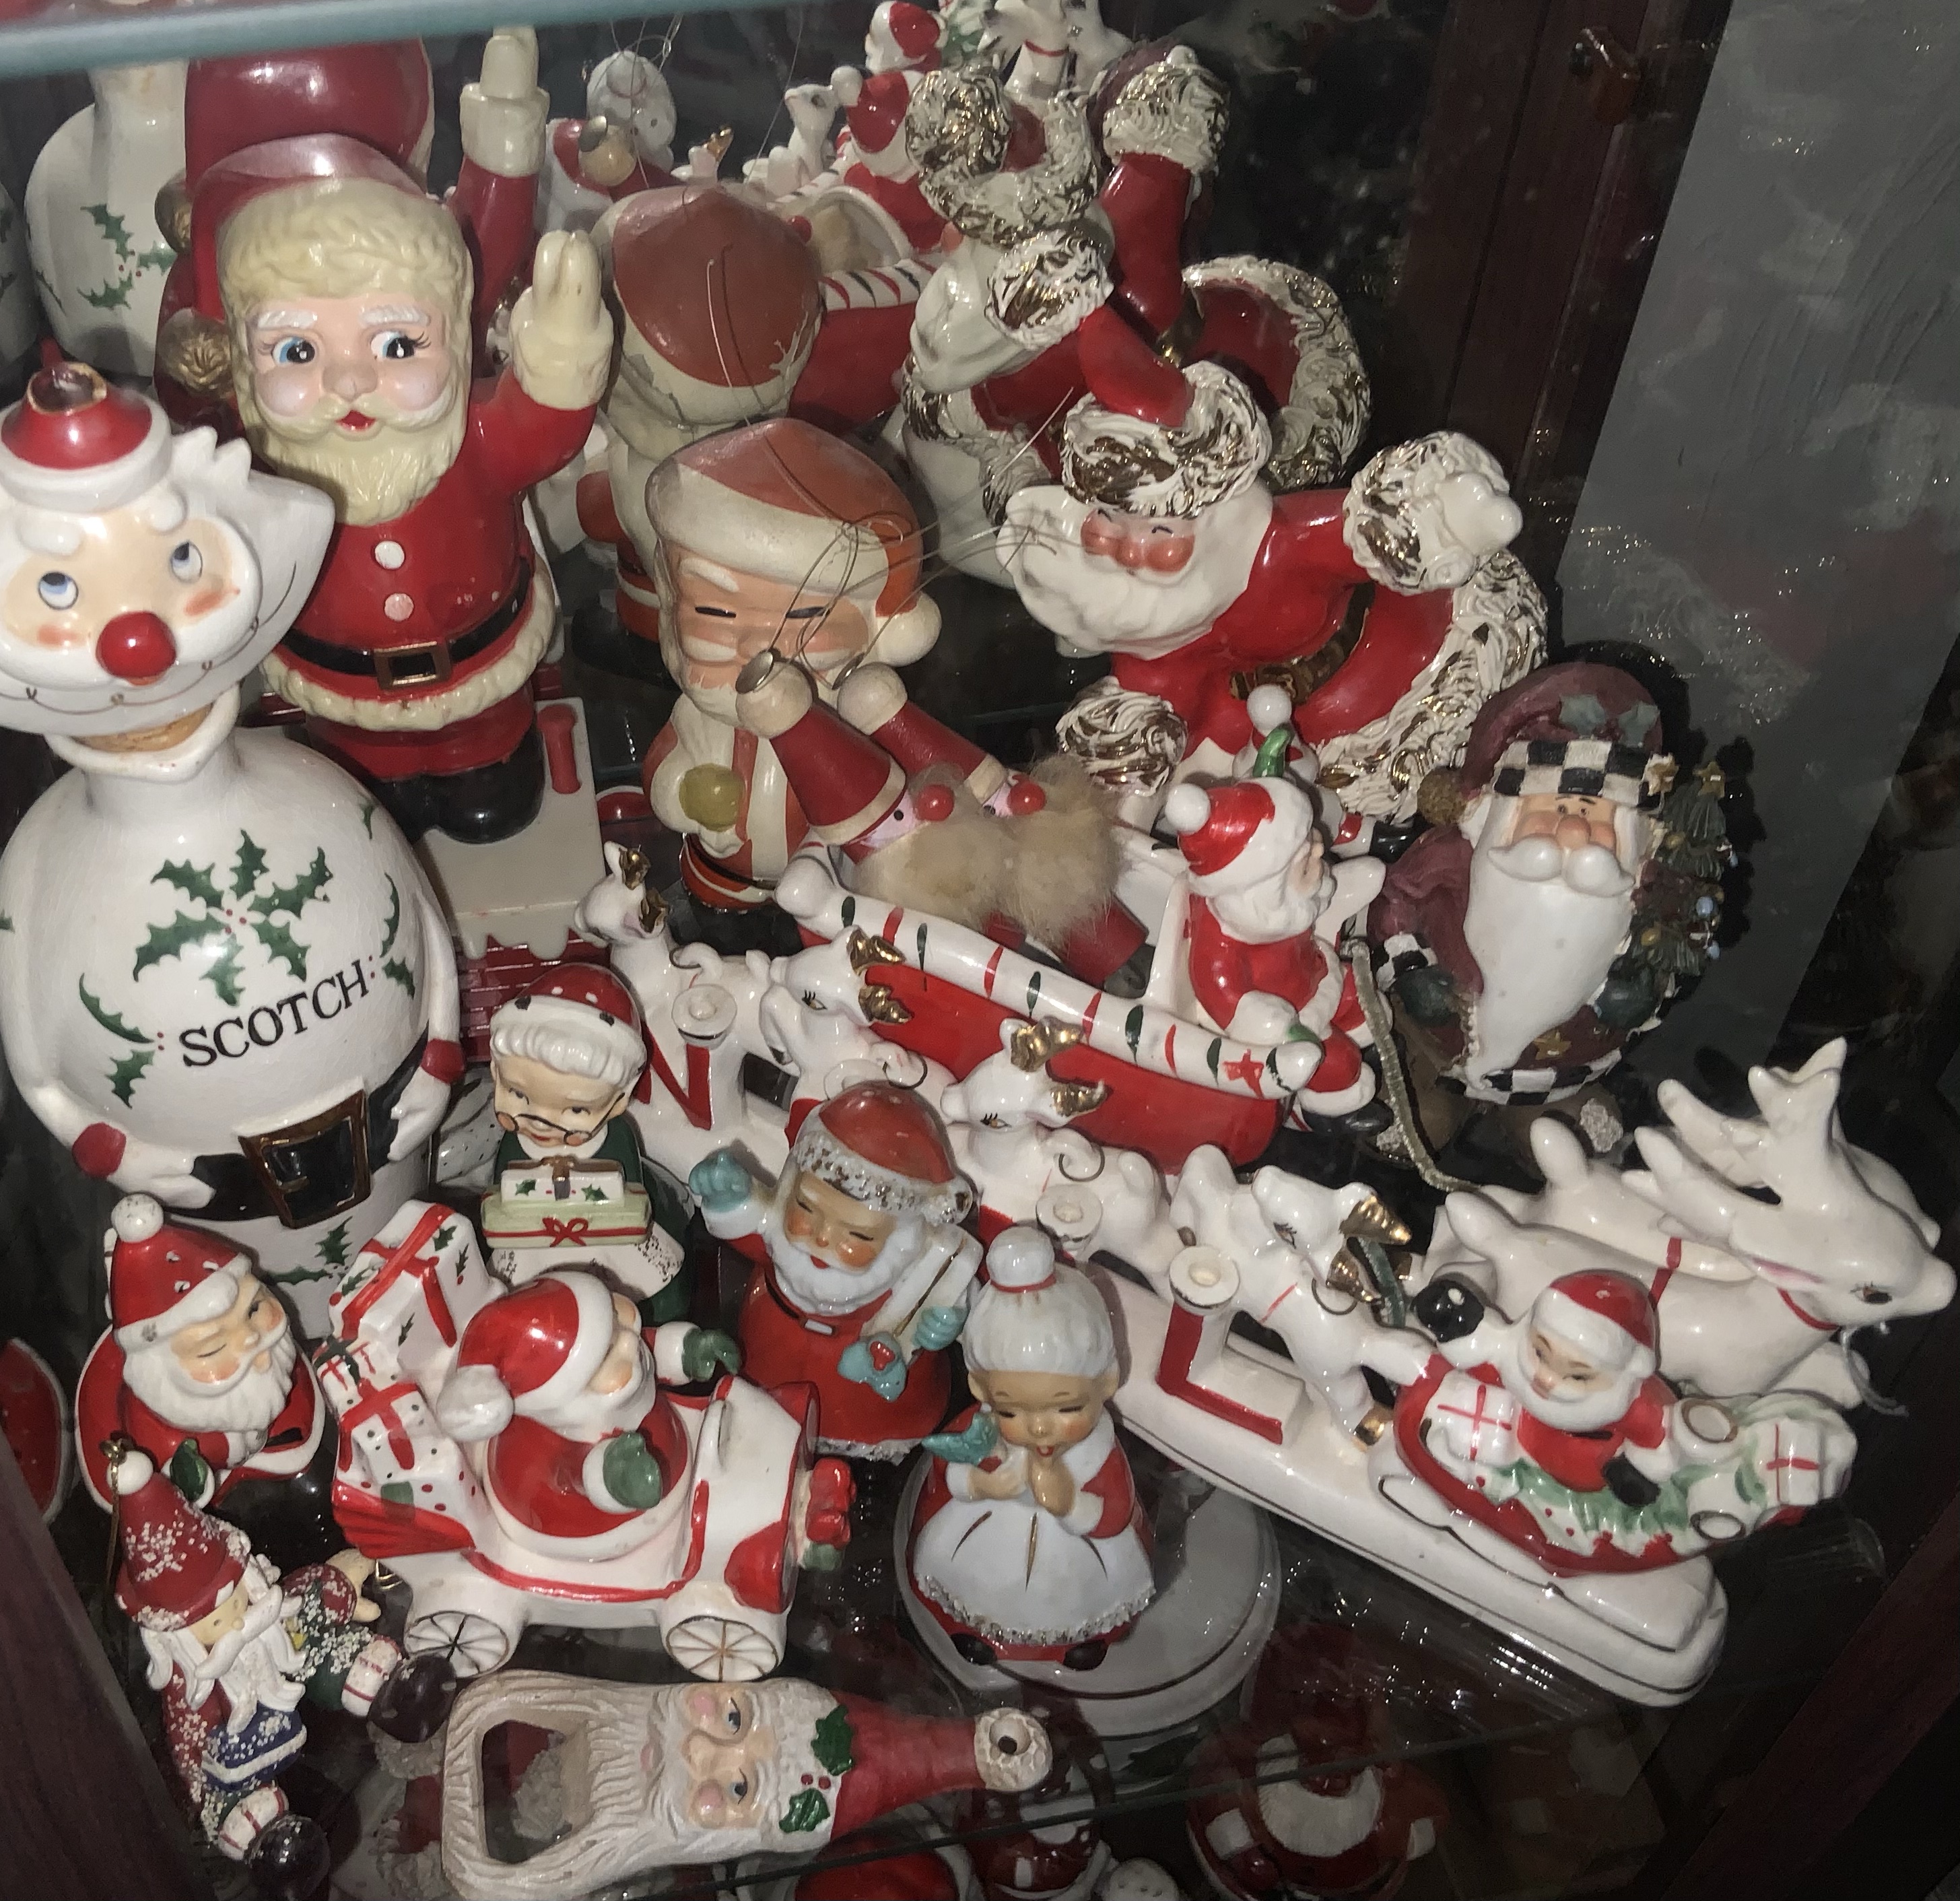
The Scotch bottle Santa was found at an auction and I’ve never seen another like it. I’ve seen other liquor decanter Santas, but they are also hard to find.

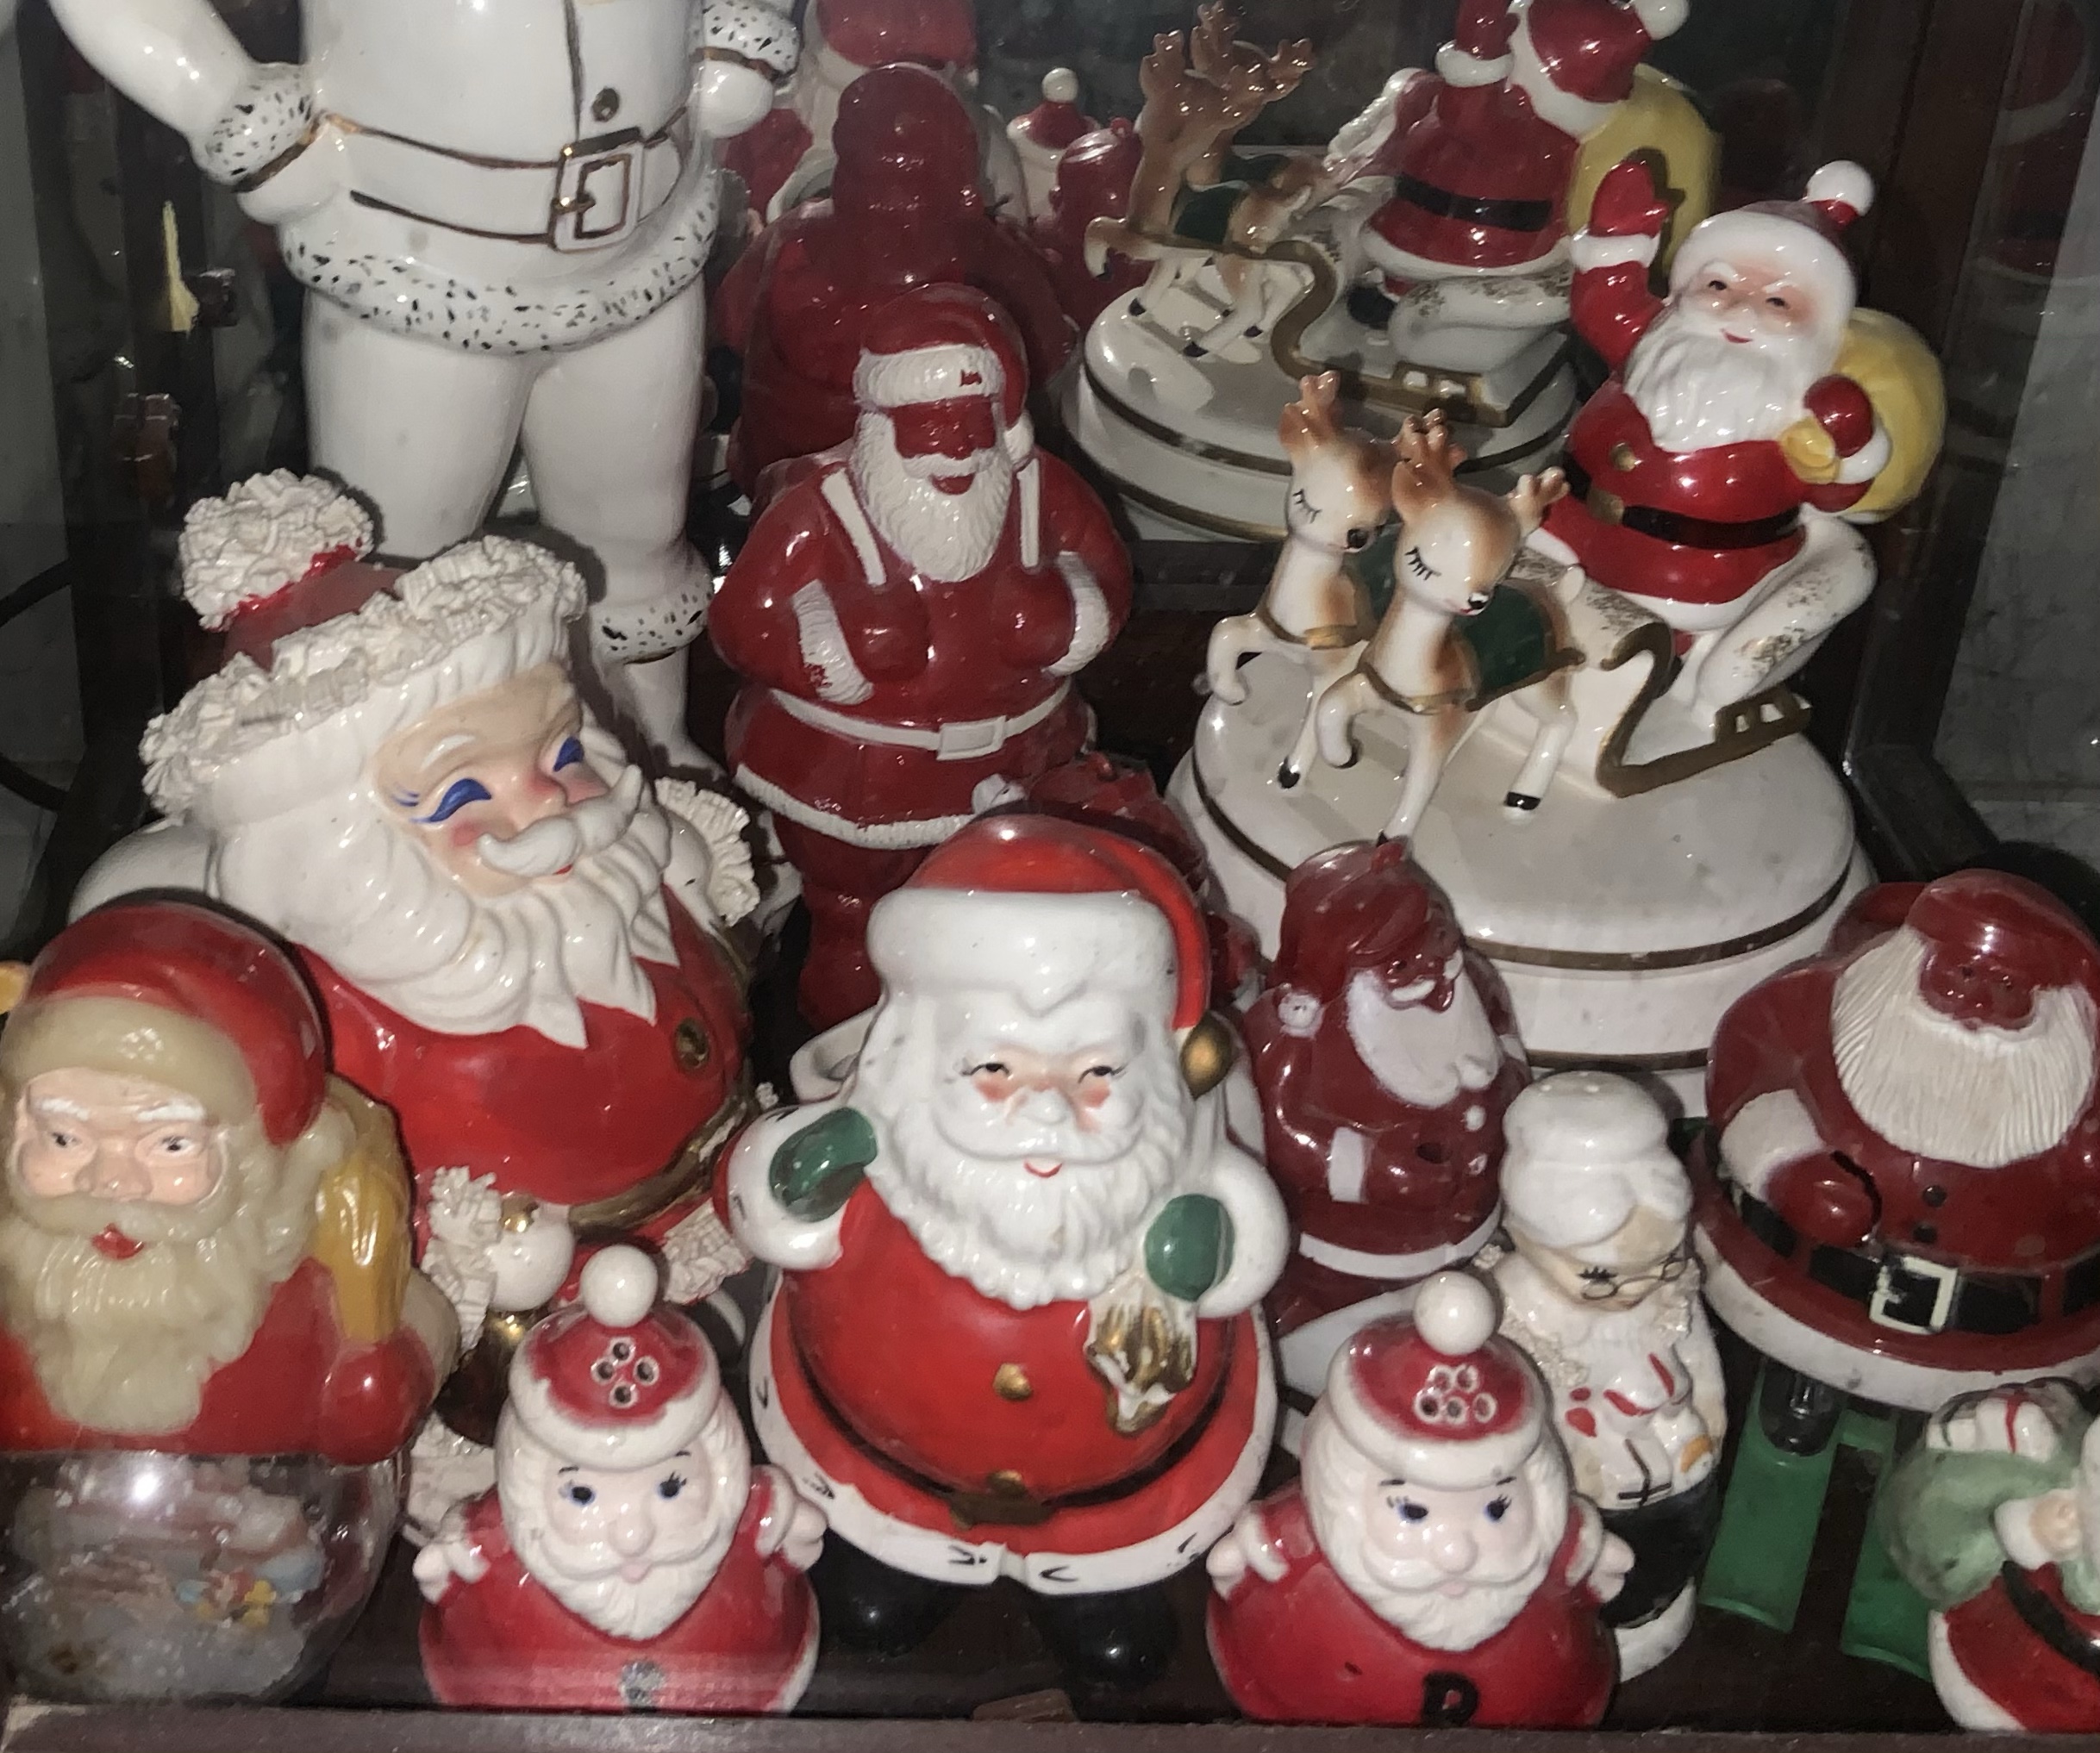
Most of the figurines and salt & pepper sets I have are from the 1950s and 1960s. The spaghetti fringe on some Santa hats and cuffs, was produced during the 1960s. Salt & pepper Santas are abundant. You can easily start your collection with S&P. But, be careful, the collecting bug will bite!

Decorating

Decorating Your table for Christmas

Vintage theme Christmas table decor

Hey everyone! I hope you had an amazing Thanksgiving. Ours was very small in comparison to last year but sometimes it’s nice to get to relax a little. I hope everyone enjoyed our Pecan Pie recipe https://bigredbarnblog.art.blog/2020/11/23/grandmas-pecan-pie/ for Thanksgiving dinner! Every year I can’t believe how time flies and this year seems to do so at warp speed. The moment you clear the table for Thanksgiving it’s time to start getting into the Christmas spirit. I don’t know about you, but this is the time I need inspiration!!

I always like to start with my dining table because it is directly in the center of my home. We have an open concept great room, and the focal point is our beautiful dining table. It was made from oak trees we had to cut down to build our home, but more on that in a later post! So I clear the table and look for inspiration. This is about the time I call my mom over to help!

My mom has always been fabulous at any sort of decorating. You can find her style in every inch of my house! Like I said before we start by clearing the table to have a blank canvas to work with. We chose to go with a vintage/rustic theme this year. My home is decorated farmhouse style so this will fit perfectly. You will want to choose a table runner that fits your theme. We picked this one up at Hobby Lobby because they have all of their Christmas items 50% off right now!

Next we picked up a galvanized container from Hobby Lobby to serve as the centerpiece. I picked up this small tree and the red and white crock at Tractor Supply last year. Tractor Supply is a little known place to pick up farmhouse style decor. I have collected the vintage ornaments over the years and brought them in for this project to tie things together.

We used industrial sewing machine spools, candle sticks and candle pillars to fill in the blank spots. Then for the finishing touches we used galvanized plate chargers, Dixie Dogwood dinner plates and two designs of smaller plates to set the table.

There you have it! A lot of the things we used were from around the house that you might not think of for your Christmas themed table. Once you have picked your items just keep moving things around until it looks balanced. What is your theme for you Christmas decor this year?

Cooking

Grandma’s Pecan Pie

My grandma was known for many of her dishes but, her pecan pie was definitely top of the list. My most treasured memories with her took place in the kitchen. We would make candy at Christmas time, fried chicken in the summer, her famous noodles for every holiday and pecan pie at thanksgiving. Growing up her parents owned a cafe in Glencoe, Oklahoma. Everyday my grandmother and her sister would make pies for the cafe before going to school. She was great at making all kinds of pies but, my favorite was her pecan pie.

When she passed I was given her recipe box, which was a mix of her hand written recipes, her friends recipes, some that were cut out of newspapers and magazines. I also received her recipe book she received as a wedding present in the 1940’s and one of her rolling pins. Her pie crust recipe, which I use, was from her friend Patsy. It yields several pie crusts so I imagine they would bake many pies at a time. The pecan pie was her recipe and I’ll share both the crust and pie recipe with you below along with the instructions.

Here are the original recipe cards ❤️

Patsy’s Pie Crust Recipe: (yields 2 large pie crusts)

  • 3 1/2 cups of all purpose flour
  • 2 cups Crisco (vegetable shortening)
  • 2 1/2 Tbs white syrup (light corn syrup)
  • 1/2 cup water
  • 1 tsp salt

Instructions:

  1. I use my KitchenAid mixer with the dough hook attachment. Sift flour and salt together then attach bowl to your KitchenAid mixer.
  2. Turn on mixer and add in the Crisco and white syrup
  3. Start by adding 1/4 of a cup of the water. Add the rest of the water slowly until you get a consistency that sticks together but not to the bowl.
  4. Divide the dough into 2 even balls. If you are not using both immediately you can freeze in a Ziplock bag until ready to use. When ready to use pull out of freezer and let thaw in the refrigerator over night.
  5. Sprinkle flour on the countertop and place a ball of dough on the flour. Sprinkle the ball with flour and begin to roll out.
  6. You will roll out to 1/8 of an inch and place in a pie pan.
  7. Pinch around the edges then trim your crust.
Make sure you get as much air out of the bag before sealing and placing in the freezer

It’s nice to have extra dough to trim so you can make it even all the way around

Grandma German’s Pecan Pie: (enough for 1 pie)

  • 1 cup light corn syrup
  • 1 cup dark brown sugar
  • 1/3 cup melted butter
  • 1 heaping cup of shelled pecans
  • 3 whole eggs
  • A dash of vanilla
  • Pinch of salt

Instructions:

  1. Preheat oven to 350 degrees
  2. Mix all ingredients except pecans well with a hand mixer
  3. Add in pecans and stir to combine
  4. Pour into pie shell
  5. Put a pie shell shield over the crust and bake for 40-50 minutes
  6. Check on pie about 20 minutes in. You may need to remove the shell shield if the crust is not browning
  7. Remove from oven and let cool
We have several pecan trees on our property that produce native pecans. If you don’t you can buy them from a local pecan farmer
A pie crust shield can be a life saver so your pie can cook in the middle and not burn on the outside
Finished product 😍

I hope this recipe finds its way into your kitchen this year. I wish you all a happy and safe Thanksgiving!

– C

Cooking

Pizza on the Traeger

We canned quite a bit of marinara this year. It’s delicious on a homemade pizza, cooked out on the Traeger Grill. It can also be cooked in the over or on your grill.

  • Start with a pizza crust dough. Find a recipe on Pinterest or buy your own. Spread it out on the pan. You might want to spray your fingers so they don’t stick to the dough.
  • Add marinara to cover the crust. Be sure to spread to the corners.
  • Add mozzarella cheese to cover. Then add your ingredients. We used pepperoni, green onion, & basil. I just chopped the basil from my garden in with the green onions.
  • Cook on the Traeger or your outdoor grill at 350 degrees for about 20 minutes or until golden brown. We set to smoke to enhance the pizza flavor.

Delicious!