Uncategorized

Handmade Farmhouse Table

When we were planning the building of our home we wanted to cut down as few trees as possible. We ended up only having to cut down two trees. We wanted to put those trees to good use so they weren’t cut down for no reason. We decided to use the wood from those trees to make our two fireplace mantles and our farmhouse table. It was a big project that took my husband, his dad and my dad a few years to complete. You have to take time with projects like this to get a really beautiful piece of furniture like this table.

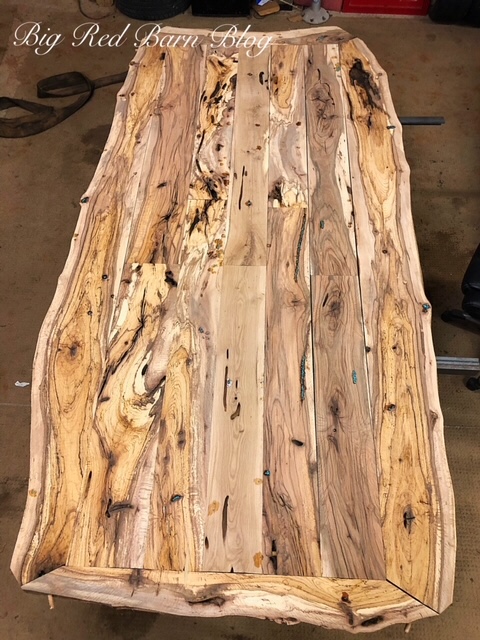
We first had to take the wood to be milled to get it down to workable pieces. This table is made from a Black Jack tree except for the middle board which is Pin Oak. Once the wood was milled we brought it home and laid it out how we wanted it to look. Once we had it how we wanted we had to sand and cut the pieces to fit together.

Here is where our dads came in. They helped hollow out an 87 year old pecan stump to be used for the base of the table. Then the three of them got the pieces of the table put up on saw horses (the planks were not light) for us to start adhering them together. My husband and I then started doweling and gluing the planks together and using vices to hold them in place to dry.

Once the middle of the table was together we had to put the ends on and start sanding everything! Our house has turquoise and red accents everywhere so I decided to make the chairs for our table turquoise. My husband then had the great idea off adding turquoise pebbles to the holes in the table. He glued them in and sanded. He even added an L to really customize our table.

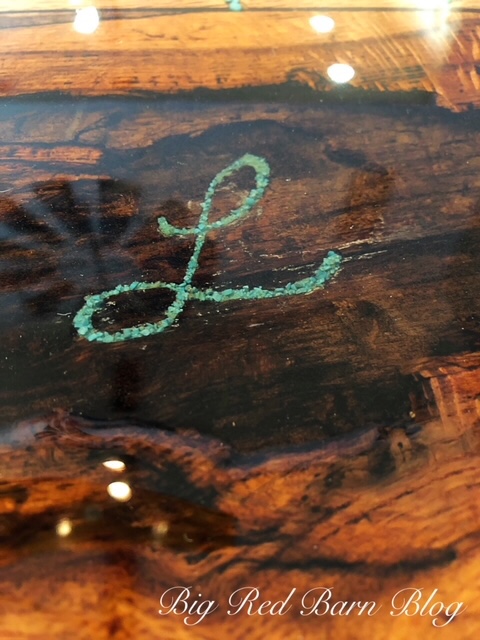
Finally, we poured a two part epoxy over the entire table. Being careful to fill in all voids and using the heat gun to get rid of any bubbles. The final piece measures 9 feet 6 inches by 5 ft. This table was a real labor of love that will have many memories for years to come!

-Cristie

Collecting

Vintage Salt and Pepper

At local farmhouse auctions and sales, you will often find some type of salt and pepper shaker collection. I have seen very large china cabinets full of salt and pepper shakers. Often, the shakers have a state, a travel destination (Niagara Falls, e.g.), etc, printed on the side. Some were sold as souvenirs and told the story of your travels. Or, friends and family would bring back a new item for your collection. Of course, I had to jump on the band wagon, and it’s another great collectible!

S&Ps are a great collectible for the beginner or most seasoned veteran. These are mostly from the 50s and 60s. They are whimsical, clever, and downright fun to collect! Many collectors are more specific – dogs, cats, chickens, holidays, etc. Others, like me, just buy what’s cute or funny. Some people collect singles, but often the pairs tell a story.

You will find many of the more whimsical pairs were made in Japan. They have easy marks to discern and you can research marks, colors, etc. These are about 2” to 4” tall. So, for a collector with limited space they are great!

The shakers above are a little different channel for collecting. Many of these are made by Fire King, McKee, etc. Some are extremely difficult to find, and you may spend a lifetime looking for a specific shaker. They are also generally much more expensive than figural salt and peppers. Again, probably from the 50s and 60s, they were often part of a larger spice set or range set, which included a grease jar, flour shaker, sugar shaker, etc.

You can find salt and pepper shakers everywhere. Antique stores, thrift stores, garage sales, etc. If you’re new to collecting, this is a great place to start! Have fun!!

Jackie

Uncategorized

Cast Iron Pizza

At times I struggle to come up with dinner ideas I haven’t used a million times. I absolutely love to use my cast iron skillets, because they are so versatile. This recipe combines my love of cast iron and deep dish pizza! It’s pretty easy and super delicious!

I like to make my own dough but you can buy a premade one if you want. For your dough you will just add all of the dry ingredients to a stand mixer and then add butter and water slowly until well incorporated. Then you’ll need to let it rise for about an hour. Take it out of the bowl, roll it out, spread the butter then fold it over into thirds. Finally, roll out again and place in cast iron.

Now for the fun part, building the pizza. Sprinkle some cheese in the bottom of the pan and add marinara on top. I use our homemade canned marinara, a recipe I will share will you in a future post. Next pile on the veggies. During the summer we use the veggies from our garden. Finally, spread some pepperoni and more cheese.

Slide the pizza in the oven and let cook for about an hour. Pull it out of the oven and let cool for a bit and then slice into it and enjoy!

Cast Iron Pizza

Ingredients:

  • 3 1/4 cups flour
  • 1/2 cup yellow cornmeal
  • 1 1/2 tsp salt
  • 1 Tbs sugar
  • 2 1/4 tsp instant yeast
  • 1 1/4 cups warm water
  • 7 Tbs of unsalted butter (3 melted, 4 softened)
  • 1 tsp olive oil
  • Marinara
  • Mozzarella
  • Toppings

Instructions:

  • Add all dry ingredients to a stand mixer bowl with the dough hook attached.
  • Slowly add water and melted butter and knead for 10 minutes.
  • Place ball of dough into a bowl rubbed with olive oil and let rise for an hour.
  • Roll out dough onto a floured surface and spread the softened butter all over it.
  • Roll the dough up and then fold it into thirds.
  • Roll the dough out again and place in a cast iron skillet.
  • Sprinkle cheese, spoon marinara over cheese, place toppings over the marinara and finish off with more cheese.
  • Trim excess dough then crimp the edges.
  • Place pizza in a 375 degree oven for an hour.
  • Pull from oven and let pizza sit for 10 minutes
  • Slice and enjoy

Here is the finished product! I love that you can customize with whatever toppings your in the mood for. This is honestly the best deep dish I have ever had. Make this recipe for your next pizza night!

-Cristie

Uncategorized

Easy Toffee Recipe

Every so often I make treats for the staff at work. I decided to try a few new recipes. I wanted to make a variety pack so I picked lemon butter shortbread cookies, truffles and toffee. Now, I’ve made candy before so I knew the basics but I had never made toffee. What I found was that it is super easy! I’m going to show you how and provide the recipe.

First you have to gather your ingredients: Butter, sugar, water, corn syrup, salt, vanilla, chocolate chips and chopped almonds. You also need to prepare a pan lined with parchment paper to pour your toffee on when it’s done cooking. Finally, grab a medium sized sauce pan to cook your toffee in and attach a candy thermometer to the inside.

You start the cooking process by heating your butter, sugar, water, corn syrup, salt and vanilla to boiling. Continue cooking until you reach 280 degrees or just between the soft crack and hard crack stage. Keep an eye on it because it goes super slow then all of a sudden it’s ready!

Once you’ve reached the desired consistency pour it onto the baking sheet lined with parchment paper. It will spread out on its own. Let it sit for five minutes then pour the chocolate chips over the top. Wait 3 minutes then spread the chocolate and sprinkle with the chopped almonds.

That’s it, it’s that easy! The recipe follows:

Toffee

Ingredients:

  • 2 cups butter
  • 2 cups sugar
  • 6 Tbs water
  • 2 Tbs corn syrup
  • 1 tsp salt
  • 1 tsp vanilla
  • 2 cups chocolate chips
  • 1 cup chopped almonds

Instructions:

  • Line a large baking sheet with parchment paper and set aside.
  • Heat your butter, sugar, water, corn syrup, salt and vanilla to boiling in a medium sauce pan.
  • Continue cooking until your batch reaches 280 degrees (just between soft crack and hard crack).
  • Quickly pour your mixture on to the baking sheet. Let sit for 5 minutes.
  • Pour the chocolate chips over the top and wait 3 minutes. Then spread the chocolate and sprinkle the nuts over the chocolate.
  • Let sit until completely cooled.
  • Break into pieces.

I put this toffee into the treat bags and had a super cute reward for the staff! It is really easy so try this recipe soon!!

-Cristie